Lorem ipsum dolor sit amet, consetetur sadipscing elitr, sed diam nonumy eirmod tempor invidunt ut labore et dolore magna aliquyam erat, sed diam voluptua. At vero eos et accusam et justo duo dolores et ea rebum. Stet clita kasd gubergren, no sea takimata sanctus est Lorem ipsum dolor sit amet. Lorem ipsum dolor sit amet, consetetur sadipscing elitr, sed diam nonumy eirmod tempor invidunt ut labore et dolore magna aliquyam erat, sed diam voluptua. At vero eos et accusam et justo duo dolores et ea rebum. Stet clita kasd gubergren, no sea takimata sanctus est Lorem ipsum dolor sit amet.

Rainy Day In Boston
Lorem ipsum dolor sit amet, consetetur sadipscing elitr, sed diam nonumy eirmod tempor invidunt ut labore et dolore magna aliquyam erat, sed diam voluptua. At vero eos et accusam et justo duo dolores et ea rebum. Stet clita kasd gubergren, no sea takimata sanctus est Lorem ipsum dolor sit amet. Lorem ipsum dolor sit amet, consetetur sadipscing elitr, sed diam nonumy eirmod tempor invidunt ut labore et dolore magna aliquyam erat, sed diam voluptua. At vero eos et accusam et justo duo dolores et ea rebum. Stet clita kasd gubergren, no sea takimata sanctus est Lorem ipsum dolor sit amet.

Achieving the TV look on an online budget
It’s 2016 and the marketeers are telling us to invest in online video. We are hearing many reasons for this:
“It will help your SEO”
“It’s cheaper than TV advertising”
“Your audience can be targeted on their commute, at home and at work”
All very good reasons, sure. But once we have accepted that we need to invest in online video, how can we make sure that our content looks good enough to be on TV yet stays within the realms of an online budget?
Whilst anyone can in theory take out their phone, shoot a video and upload it in seconds to their website and social media channels, businesses who care about their image and production values (I imagine that’s most of us) will certainly get better value from investing in professional online video. Gone are the days of dull looking corporate videos. We’re in the age where online advertising should look as good as TV!
So, how could you get the TV look on an online budget?
Through utilising cost effective technology.
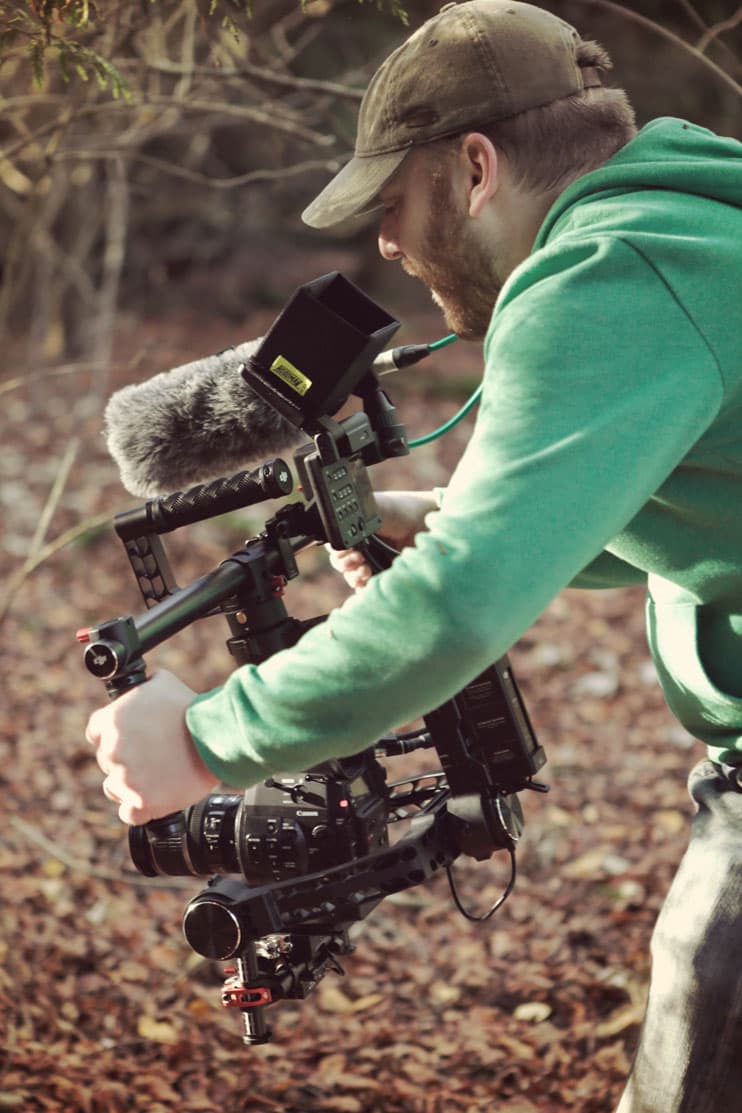
Getting the TV look (or even the film look!) with the nimble DJI Ronin
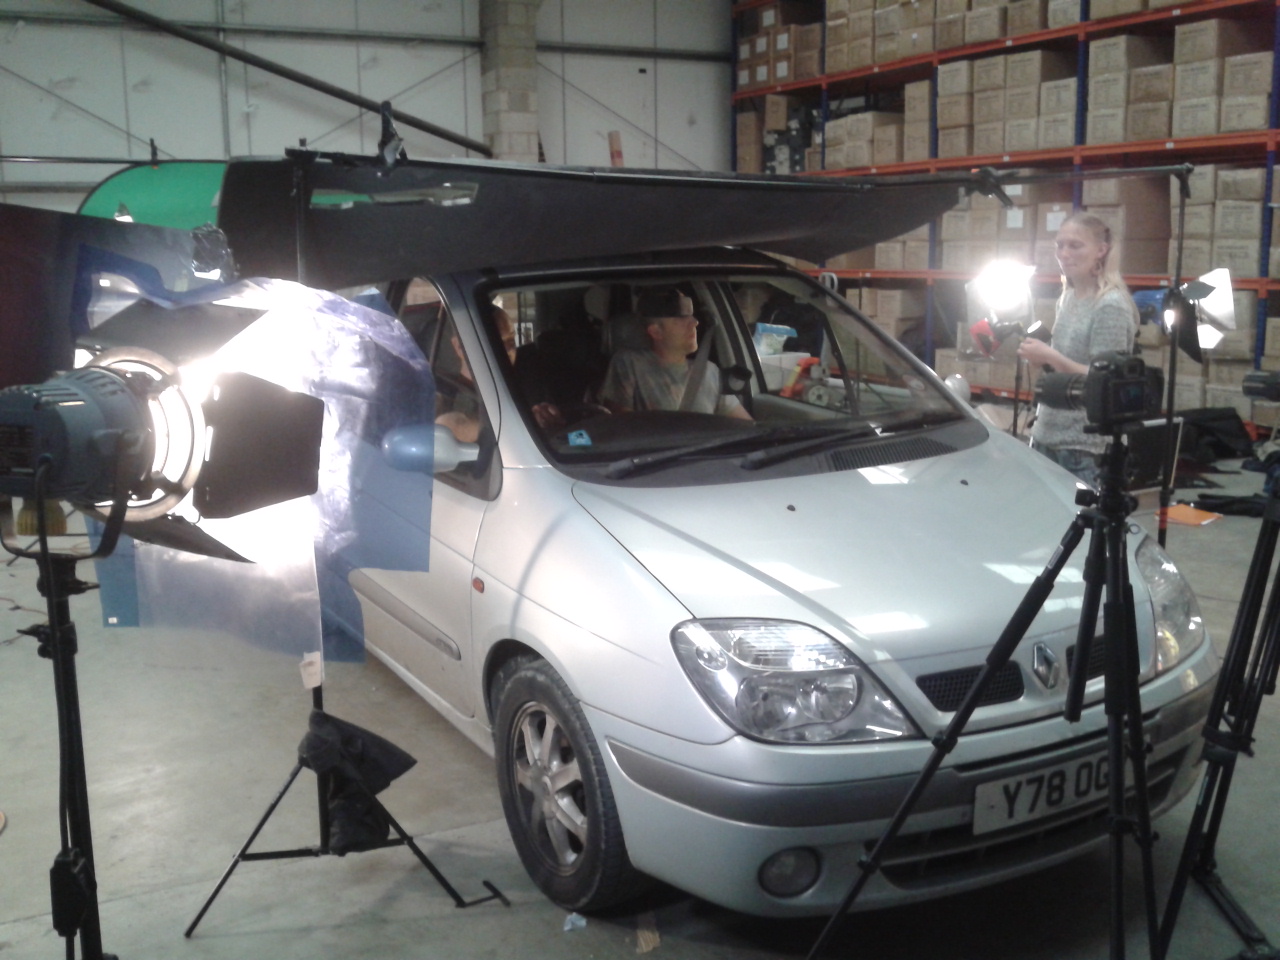
One of the major benefits of opting for online content rather than broadcast media is that the fast moving digital landscape is allowing technology to be more affordable than ever before. You’ll have already experienced it with your electronic devices at home and the same applies in the video production industry. Cameras that produce beautiful images fit for broadcast are now within reach. As a result we use everything from larger cinema cameras to tiny DSLRs to portray your business in the best light. To keep things economical we buy some of the equipment outright whereas other bits are more cost effective to hire. This ensures that we can provide quality equipment all year round and still have access to anything specialist or brand spanking new when you need it, getting the best of both worlds.
Another example is in the aerial photography world. As HD cameras have gotten smaller they have been easier to attach to UAVs – aka drones! Only a few years ago aerial photography was too expensive a venture for most businesses; drones are obviously much more cost effective than helicopters!
If you have an interest in tech then you might like this article on how to choose the right camera.
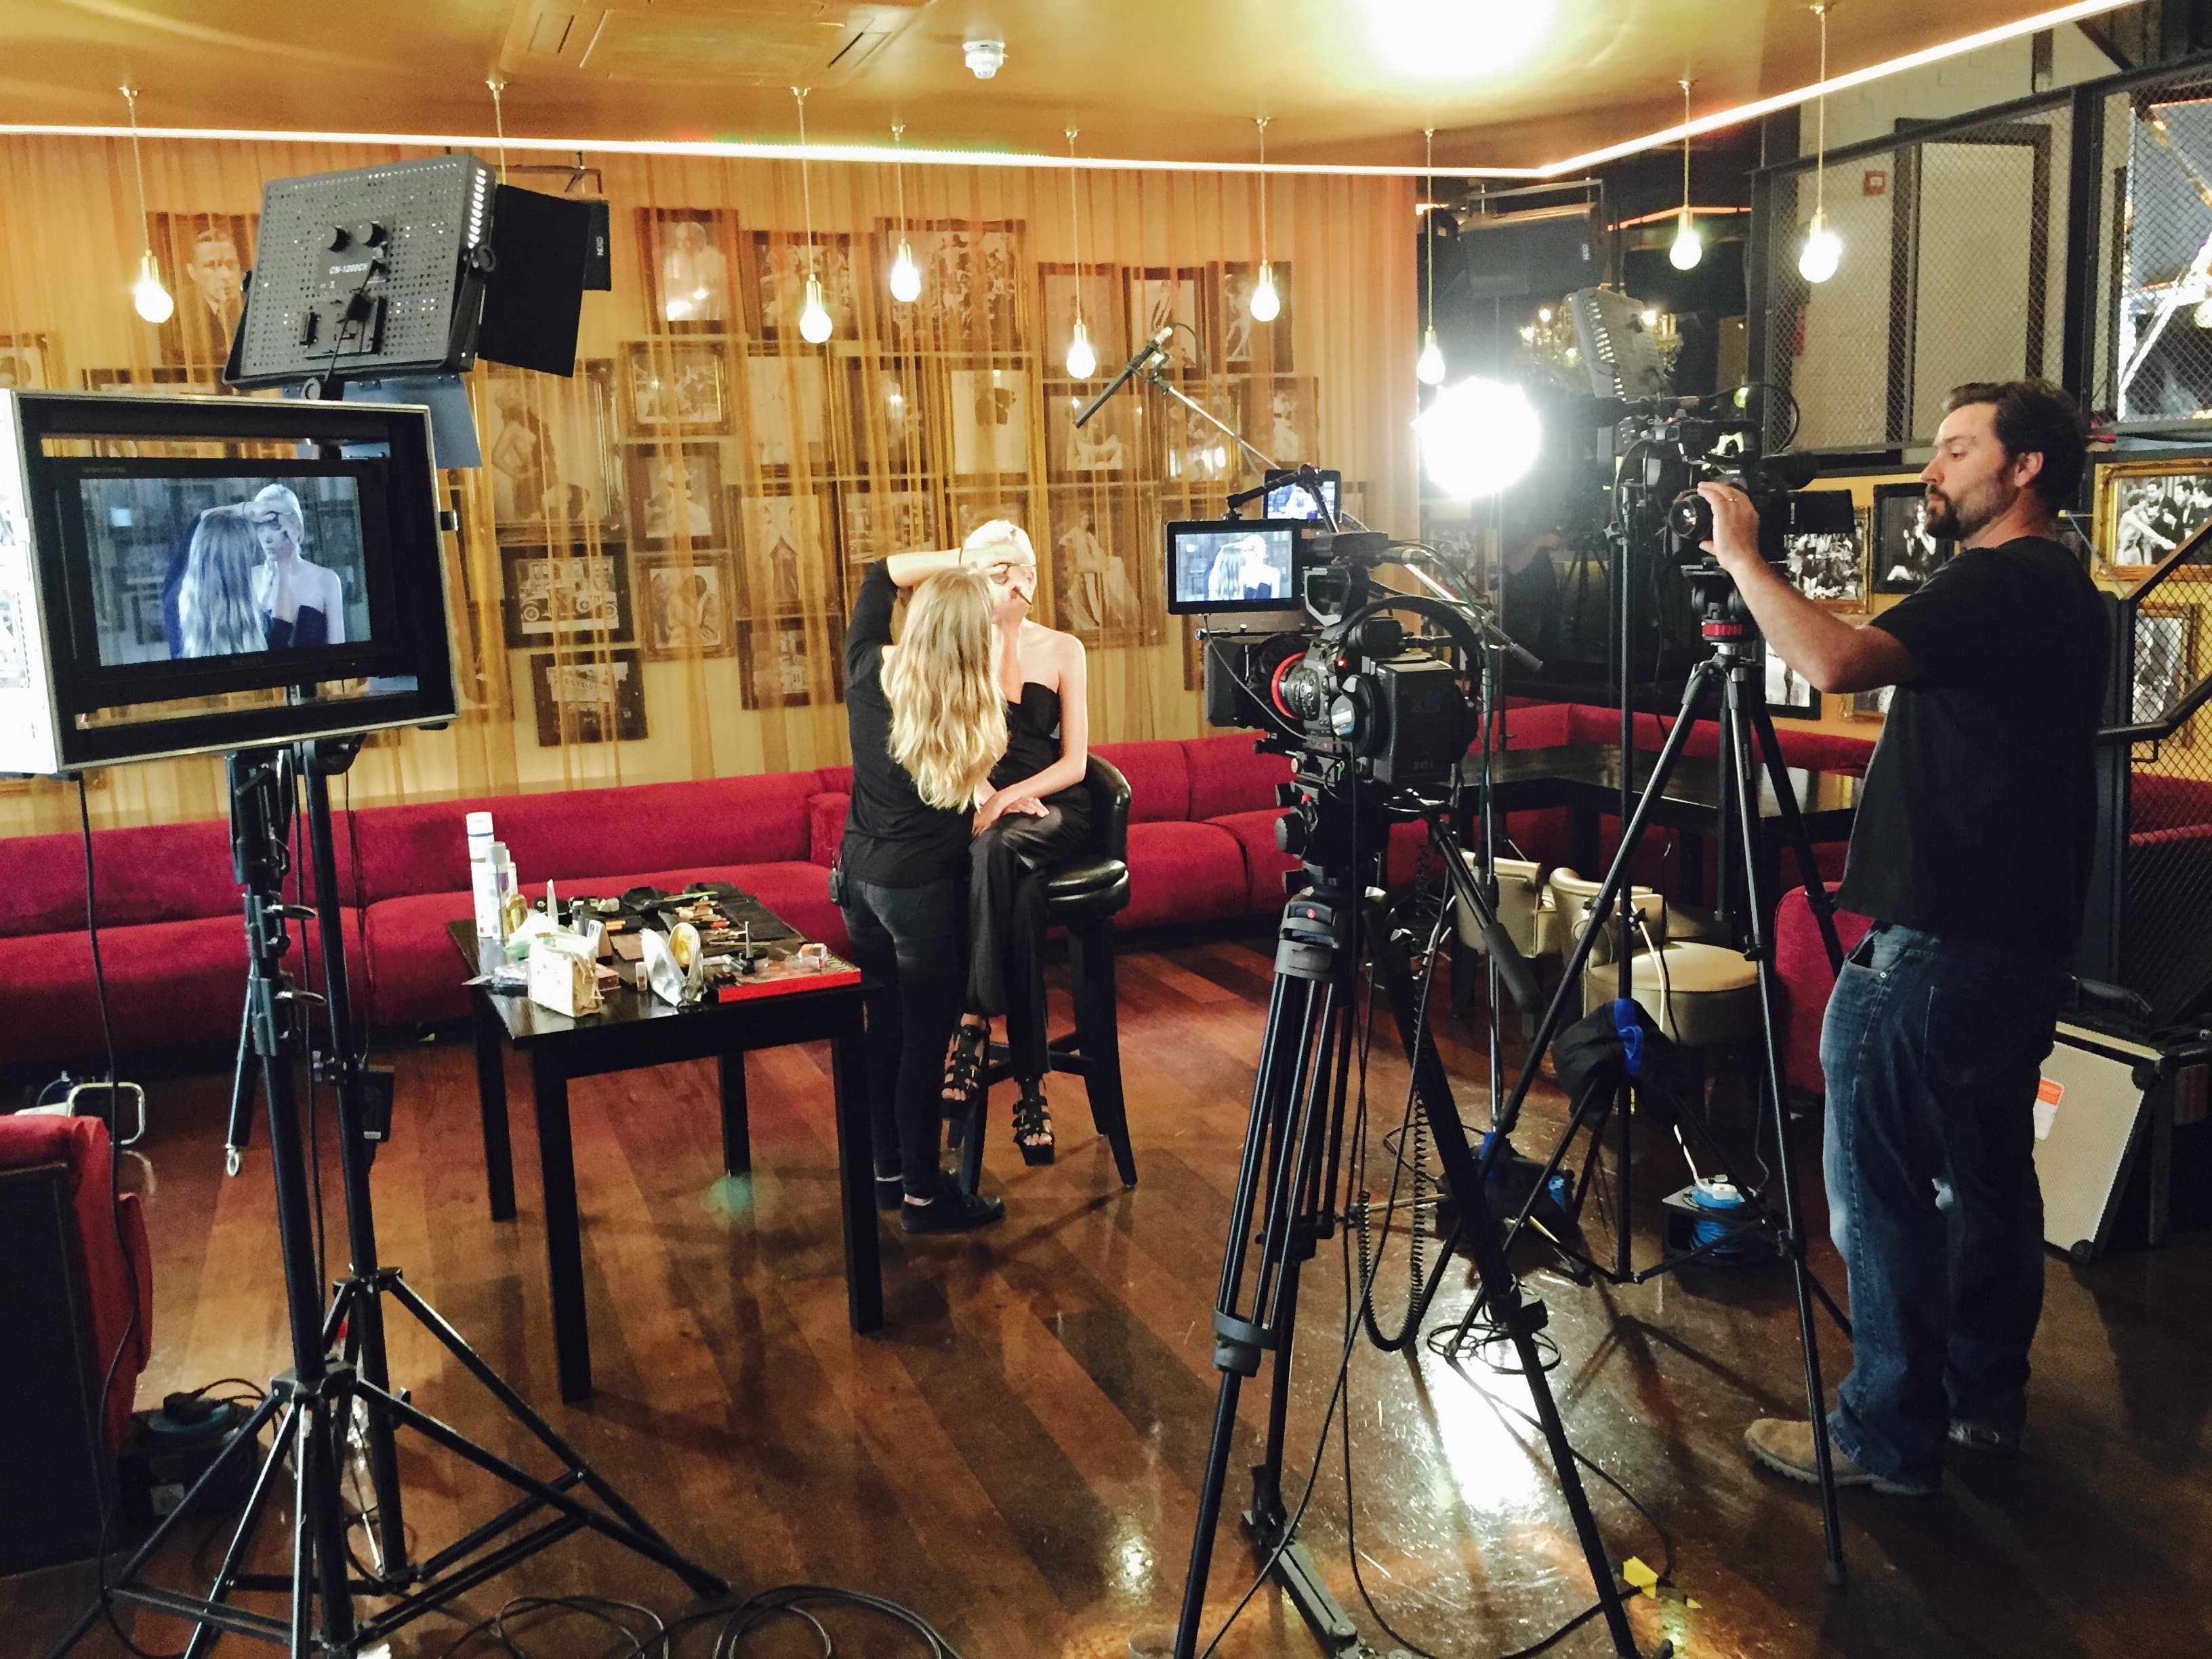
It’s not just the camera: lighting & sound are important too.
One of the cons of this technology becoming affordable is that suddenly everybody considers themselves a Video Producer. Some think they can just buy an HD camera and become a professional without considering other areas of video production. What contributes immensely to creating a high value production or the ‘TV look’ is lighting and sound and at fly we respect that. Just because you may be considering a less expensive option that doesn’t mean your product should be cheap!
A little bit more on lighting:
Only fairly recently have many cameras started to become good in low light conditions. However despite this, even big TV programmes today still require the use of lighting rigs. Next time you are watching X Factor take a look at the background of the wide shots. You’ll often see a large film light of some sort. Apart from being able to see the subjects, lighting is used to make people look good! Don’t you want your business to look good?
With an untrained eye it can be easy to accept a TV image as ‘real life’. Trust us though, you’ll notice the lighting when it’s gone. Or if it’s bad!
Music to the ears:
The other half of achieving the TV look is through getting good sound. When it’s not good you’ll notice it and will wish that you’d hired a professional. To maintain TV production values on an online budget we also take our sound very seriously, using broadcast quality microphones and recorders to ensure clarity and noiseless recordings. Some projects require their own sound recordist, just as in TV.
As online productions are usually smaller in scale than big TV shows, there is less of a requirement for large lighting rigs, mixing desks and huge teams of personnel which can add substantially to the cost of a production. Portable lighting kits, solo sound engineers and self shooting producers are more widely used than ever before. The number of crew required will depend on your individual requirements, but generally speaking the crews are small for online content.
Through planning and creativity, except you are in control.
Creating content for broadcast can sometimes be a little restricting. All of the major broadcasters such as ITV and SKY have strict broadcast guidelines regarding what can be considered ‘fit for broadcast’. Whilst legal issues such as libel, defamation and copyright breaches aren’t exactly blown under the carpet when it comes to producing online, the truth is by not having so many restrictions and guidelines to meet you can effectively have a lot more freedom when it comes to the kind of content you want to produce, how long that content should be and when you want to release it. With broadcast advertising you may also be competing with many other organisations, all after the same airtime. This can once again hike up the cost. Obviously, to get the most engagement from online distribution you should have a well informed social media and marketing strategy in place.
The beauty of having freedom to create whatever you want (within reason!) means that it’s easier to innovate and choose an idea that hasn’t been done before. This can increase the likelihood of your content being shared and for some, can even mean going viral. Remember, it has been accessibility to content on social media that has helped many adverts (that were originally made for broadcast) go viral. Do you think the Old Spice adverts would have had as much success if they weren’t shared on social media?
Need some inspiration? Take a look at this promo for Virgin Holidays where we got a bit creative. Cinematic slow motion cameras were used to capture members of Cirque du Soleil performing acrobatics on the streets of London.
https://mustard.film/portfolio/virgin-holidays/
The finishing touches to the TV look: post production.
To get the TV look it’s not just about the shoot itself but what we do to the footage afterwards. Colour grading, as part of the editing process, is used to enhance the images so that they help evoke a certain emotion from the audience. This can make your brand stand out from the crowd. Once this is done titles, text, motion graphics and animation can be added to further enhance the production.
The video below is a good example of how a project was really brought to life through post production. Not only did we shoot a range of material to promote London in the summer through the use of steadicams, drones and slow motion filming, but we added warm flashes of colour throughout to give off a summer flavour and produced some small animations along with the text. There’s a lot going on here and it certainly looks fit for TV.
https://mustard.film/portfolio/visit-london-summer-in-the-city/
Don’t forget..optimise your content for your chosen demographic!
Just because you’ve got your content looking like it should be on the telly you must not forget one of the key reasons for choosing to advertise online in the first place. Your creative freedom and a flexible online budget can allow you to customise your content for particular audiences; from simply adjusting the title cards for each audience to creating specific ads for each demographic. Once again, timing of release is crucial here too. What time of day are your customers most likely to be online? With so many options available, it’s down to you to decide what you would like and we will help you realise your vision.
And another thing..
The recurring theme here and the key difference between producing content for TV and online is the scale. Whilst there are many technological savings to be made and in ways a lot more freedom to produce the content you want for online, you will still have to consider the scale of your production. Hiring 50 extras to star in the background of a promo in London Victoria Station is still going to cost a fortune, regardless of whether it is for web or TV. If you are prepared to think big but balance it with realism then there is no reason why you can’t make substantial savings and still walk away with an incredible advert for your business.
To find out how we can achieve the TV look in your online production come on by and say hello!
5 ways to get better value video
In Britain we do love getting good value for money. However, investing for business can be a bit of a minefield. Whether or not video content is at the top of your list you can’t ignore the fact that the marketeers claim video is more crucial than ever. This is especially important where online presence and SEO are concerned. It’s true though; in an increasingly competitive world video can play a huge role in helping businesses stay ahead of the game. Simply put, they can engage, inform and entertain current and prospective customers much more efficiently than text.
One question many newcomers to video ask is:
How do I know I’ll get a return on investment?
The truth is, nobody can promise this. Every business investment you make, regardless of the cost and scale is a risk. However without risk there is no gain and by hiring specialists, such as a Video Production team, you can benefit from their expertise and experience in order to significantly reduce the risk and increase the likelihood of ROI.
But isn’t video expensive?
Yes, sometimes it can be, but it doesn’t always have to be. With a well defined strategy for how your video will be used, who your audience is and by using time effectively there are ways to get exceptional value out of your video content. With a bit of knowledge and planning you can get excellent value. Suddenly you’ll find your venture has been transformed from being a costly expense into a cost effective investment.
So, if you’re still on the fence about investing in video here are a few ideas how you could get more video for your money with fly:
1. Give as much notice as you can.
The more notice we are given about your project the better the end result will be. Whilst we could simply turn up on the day and hope for the best a better approach might be to help you develop your idea into a script and a story board beforehand so the filming is seamless. There are also many logistical elements that are better (or only possible!) with time too; booking a good room to film in at your premises, securing people for interviews, hiring specialist crew or equipment etc. Whilst we’re no strangers to last minute projects, the more notice we are given the better the end product will be and the happier you’ll be.
Our Alumni film below for the University of Brighton would never have happened if we hadn’t have given Fatboy Slim a little bit of notice. He’s a busy man!
https://mustard.film/portfolio/uob-alumni-film/
The bottom line: Booking a video production company is like booking train tickets, do it in advance (except we’ll actually turn up on time)!
2. Get the most out of your filming days.
When you hire us to film, you get us for the full day. Why not, if you’re not already, utilise us for the time you’ve paid for? Even if you have captured everything by lunchtime, there is often so much potential for content to be captured that may be useful at a later date you might as well get it there and then! Here are some examples:
- If you’re getting a promotional video made, why not schedule in some testimonials too? These could be included in the main video as well as released in their own separate videos. This means more content for your Youtube channel and consequently improved SEO (you hear that Google?!)
- Filming a 1 shot interview? Let us film the subject in their day to day work to get ‘cutaway’ or connecting shots which can be used to hide cuts (so we can take out the ‘ums’ and ‘ers’). It’s OK, we don’t need to be invasive if they are busy. Interesting ‘cutaways’ are always worth getting because using them can make content more visually interesting, pacier and ultimately increase the chances of higher audience retention. They may also be useful in future content.
Not to say that we don’t ever want to go home, but utilising us effectively will give you better value in the long run and it’ll raise the bar too.
Another one for the University of Brighton; we live streamed their graduations alongside producing a highlights video for them by capturing footage in the breaks. We just love a bit of efficiency!
https://mustard.film/portfolio/university-of-brighton-winter-ceremonies/
The bottom line: We always prefer to have the footage and not need it than the other way round!
3. Release your videos at the right time & spread multiple video releases over time.
Showing off new content as soon as it’s finished can be very tempting. However, to get the most impact from a release the timing is crucial, especially where social media comes into play. Do you think your customers will more likely notice your release on a Sunday evening or a Monday morning?
If you’re releasing multiple videos (separate testimonials or FAQs for example) then sometimes it may be more beneficial to release them gradually over time as part of a carefully planned marketing/social media strategy. A video a month or even a week will have customers coming back to your site regularly which once again is great for SEO and website traffic in general. If your content is engaging and has been produced professionally, your subscribers will value your output more and will await your next release with anticipation. Even for longer videos, a 30 second teaser could be easily produced to get your audience interested in your upcoming content through social media.
We produced a series of makeup tutorials for professional make up artist Ruby Lonsdale. Just 1 days filming resulted in numerous tutorials and is a great example of how content can be used to build up an audience over time. See one of them below.
https://mustard.film/portfolio/thebodyshop/
The bottom line: Good synergy between video production and marketing is essential for getting good value.
4. Allow the professionals to produce your video content for the entire process.
We know it may be tempting to get a student to edit your video for ‘experience’ or to just shoot it on your iPhone (sigh). However if you try to cut corners then you’ll probably end up coming to the pros anyway sooner or later. ‘If you buy cheap you buy twice’ as they say and in video production there is no exception. We can’t make your shaky, grainy phone footage look or sound good I’m afraid. By getting it right from the start you can benefit from the many years of experience and industry standard equipment that the pros (us!) can offer. Maybe your project could do with some quality motion graphics or your event could be live streamed? Services such as these can really elevate your output which will impress your current and future clientele.
Fun animation and motion graphics are great ways of impressing your customers and will really show that you mean business. Here’s one we did for King’s Education:
https://mustard.film/portfolio/kings-education-pathways/
The bottom line: show your business in the best light from the start!
5. Build a relationship with your video production team.
What’s so great about working in this industry for us is that it is all about building relationships. Think about whenever you pay for a service, such as when you go to get your car fixed. How often do you find yourself going back to the same provider of the service? You may find yourself even going out of your way so that you can have that service; you know what to expect and you can trust the provider to always make you happy. For us in video production it is very much like this; many of our clients come back time and time again to use our services for that very reason: trust.
How can you benefit from this relationship? There are actually many ways! A good video production team will get to know your business, your market and your target audience much better when working together long term. We may not be experts in your field but after a period of collaboration we’ll know your business much better than if you were to hire someone new and start all over. Even on a practical level; if we already have footage, logos and an understanding of your brand, it is far easier and less time consuming for us to re edit or reuse these materials in future content than it would be to pass it on to someone else. Further down the line, retainer contracts can be excellent for both parties; you can get a set amount of video content on a regular basis at a good price. You get better value and we get the security of regular work. It’s a win win situation for all.
After producing two videos for Visit Britain we followed them up with one for Visit London. Understanding the brand values and bringing them to the screen in a creative way helped us land this one:
https://mustard.film/portfolio/visit-london-summer-in-the-city/
The bottom line: if it ain’t broke, don’t fix it. Just build on it!
Ready to increase the value of your content?
A bit of creativity and an effective marketing strategy are the real secrets here to getting better value video. Just having video content isn’t good enough this day and age; you have to stand out from the crowd. With a claim that 300 hours worth of content is uploaded to Youtube every day, there’s a lot of content to compete with. If you make good creative and marketing decisions from the outset your content will become more shareable which means a greater chance of return on investment, no matter which industry you’re in. Little things such as adding tags, descriptions and even subtitles can also help you grow your audience and improve your SEO for not much extra effort.
We may not have the secret to going viral. However we do know how to make videos that will excite, engage and entertain your audience, whoever they may be. To find out more about how we could spice up your video content in London, Brighton or further afield then drop us a line today.
How to prepare for your video interview
Whether you are preparing for your first ever interview on camera or you’ve been filmed a few times before, the prospect of being interviewed, for some, can be a little daunting. Even if you do know what to expect, the most confident and experienced of people can still find themselves stumbling as soon as the camera rolls. If you find yourself a little nervous that’s OK, you’re not alone. However, filming doesn’t have to be a strenuous task and with our guidance we’ll have you speaking confidently on camera in no time.
The purpose of this article is to give you a few quick tips about the filming process so that you don’t just leave your shoot with engaging material but you also enjoy the experience.
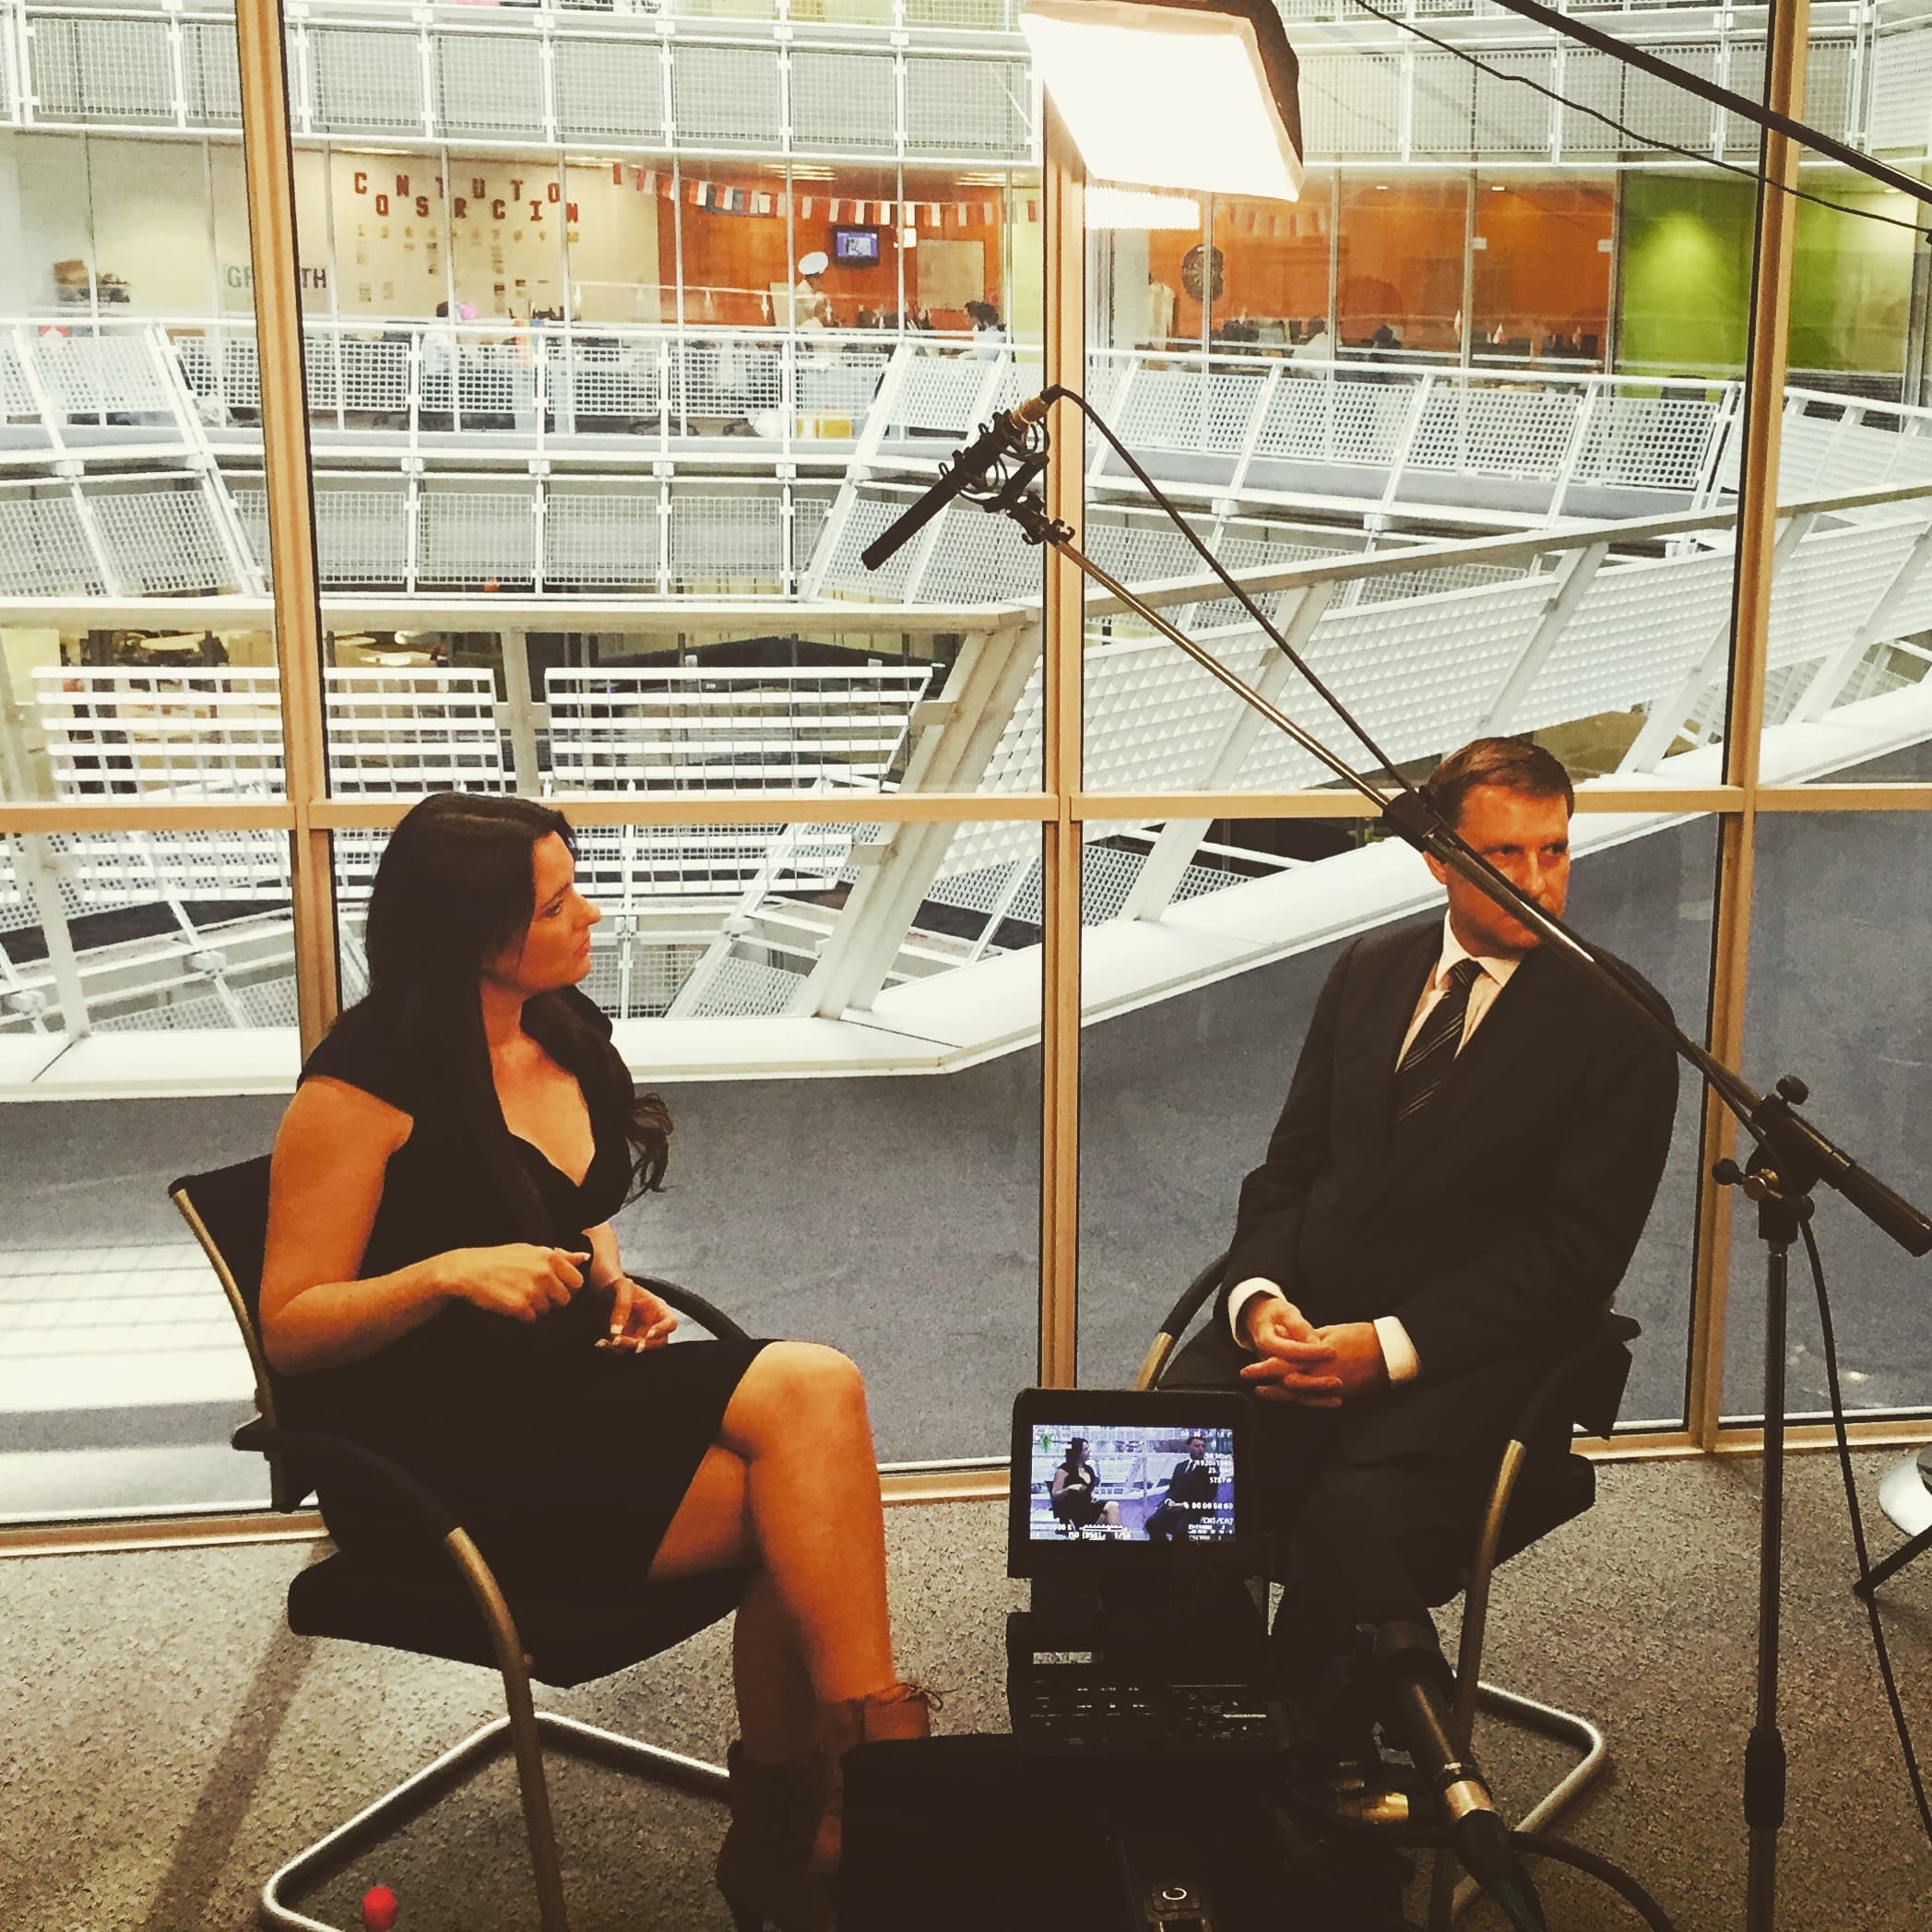
First things first: eyeline
 Most corporate, promotional and event video interviews are carried out with the interviewee looking away from the camera rather than into the lens. Unless you are delivering a presentation or presenting a show then this is usually the best way to do it. Without having to look down the lens your interview has already become much easier as you can look directly at the person asking the questions, whether that be the videographer or someone from your own organisation. This approach helps you to forget that the camera is even there. All that it’s really doing is documenting a conversation.
Talk about what you know
It should be safe to assume that you’re being interviewed about a subject that you’re highly knowledgeable about. You will probably be saying things that you regularly talk about in your day to day work. So if there are any questions you’re unsure about, speak up and let your videographer know. Some questions might be better for a colleague!
With these first two points you may find that the interview process is already much easier than you initially thought.
Full sentences please
Now this is where it g ets a little trickier. Although we should treat your interview as the “documenting of a conversation” the truth is for most promotional videos this conversation is actually going to be quite one sided. To keep up the pace of your video and deliver the crucial information, we need to cut out the interviewer’s questions so that we only hear you. To make this work, you’ll need to answer the questions in full sentences so that your answer still makes sense when the question is removed. This may involve you repeating the question in your answer.
Here are some examples.
The incorrect method:
INTERVIEWER
Do you enjoy working in video production?
ME
Yes, I do.
This isn’t suitable because if we inserted this into a sequence nobody would know what I was saying yes to!
The correct method:
INTERVIEWER
Do you enjoy working in video production?
ME
I enjoy working in video production because it’s a fast moving industry. It can be competitive and challenging at times, but ultimately it’s very rewarding work.
This answer is much better. Notice how I’ve expanded on my original answer a little bit and as a result it is much more interesting.
Technical matters
There are a few other things to bear in mind before you start filming. If you’ve hired video professionals such as flycreative, you won’t need to worry about the technical side of things. That’s what we’re there for! However, it is good to have some awareness of what we will be doing so it doesn’t surprise you on the day.
We want you to look and sound your best. To achieve this and avoid a costly reshoot we aim to capture the best material possible whilst we’re there. From a technical standpoint there could be a number of reasons why we might need to stop, solve an issue and repeat the question again. Our lighting might need adjusting or our microphones may be picking up a loud conversation outside the room o r humming from the air con. We may ask you to repeat your answer but shorten it slightly, rephrase it to avoid repetition of certain words or allow a slightly bigger gap between the question and your answer so nobody is talking over each other. Sometimes it’s good just to have options when it comes to the edit. If your videographer does intervene, don’t worry, this is perfectly normal.
Practice makes perfect
Because filming can require a bit of setup time, you can actually use this to your advantage. If you allow yourself enough time whilst the videographer is setting up you can actually practice what you’re going to say before the camera rolls. Even if they are operating alone and are asking the questions themselves, they will still need to test their audio levels, so this is your time to practice and to talk with them about your answers. You’ll soon feel at ease.
Example interviews
If you still need a bit of reassurance, why not see how others have done it? In our Signature Airlines promo we shot multiple interviews and achieved a fast paced, informative video through applying these techniques. It may not be obvious, but the majority of the people in this video had never been filmed before!
For the purposes of the edit (e.g. pacing) your full interview may not make it into the final video. This shouldn’t alarm you; usually there isn’t enough time to feature everything in a 3 minute video! Being concise and to the point is key and our Signature Airlines video demonstrates this perfectly.
Ready to do your interview?
Remember that the beauty of video production is that you can always stop and answer your question again. There’s no need to worry, even professional actors rarely nail it on the first take!
Now that you’re armed with these tips you can relax and go into your interview feeling like a pro.
To find out more about getting a professional video made for your business drop us a line today.
Standard Blog Post With All The Trimmings
Lorem ipsum dolor sit amet, consetetur sadipscing elitr, sed diam nonumy eirmod tempor invidunt ut labore et dolore magna aliquyam erat, sed diam voluptua. At vero eos et accusam et justo duo dolores et ea rebum. Stet clita kasd gubergren, no sea takimata sanctus est Lorem ipsum dolor sit amet. Lorem ipsum dolor sit amet, consetetur sadipscing elitr, sed diam nonumy eirmod tempor invidunt ut labore et dolore magna aliquyam erat, sed diam voluptua. At vero eos et accusam et justo duo dolores et ea rebum. Stet clita kasd gubergren, no sea takimata sanctus est Lorem ipsum dolor sit amet.
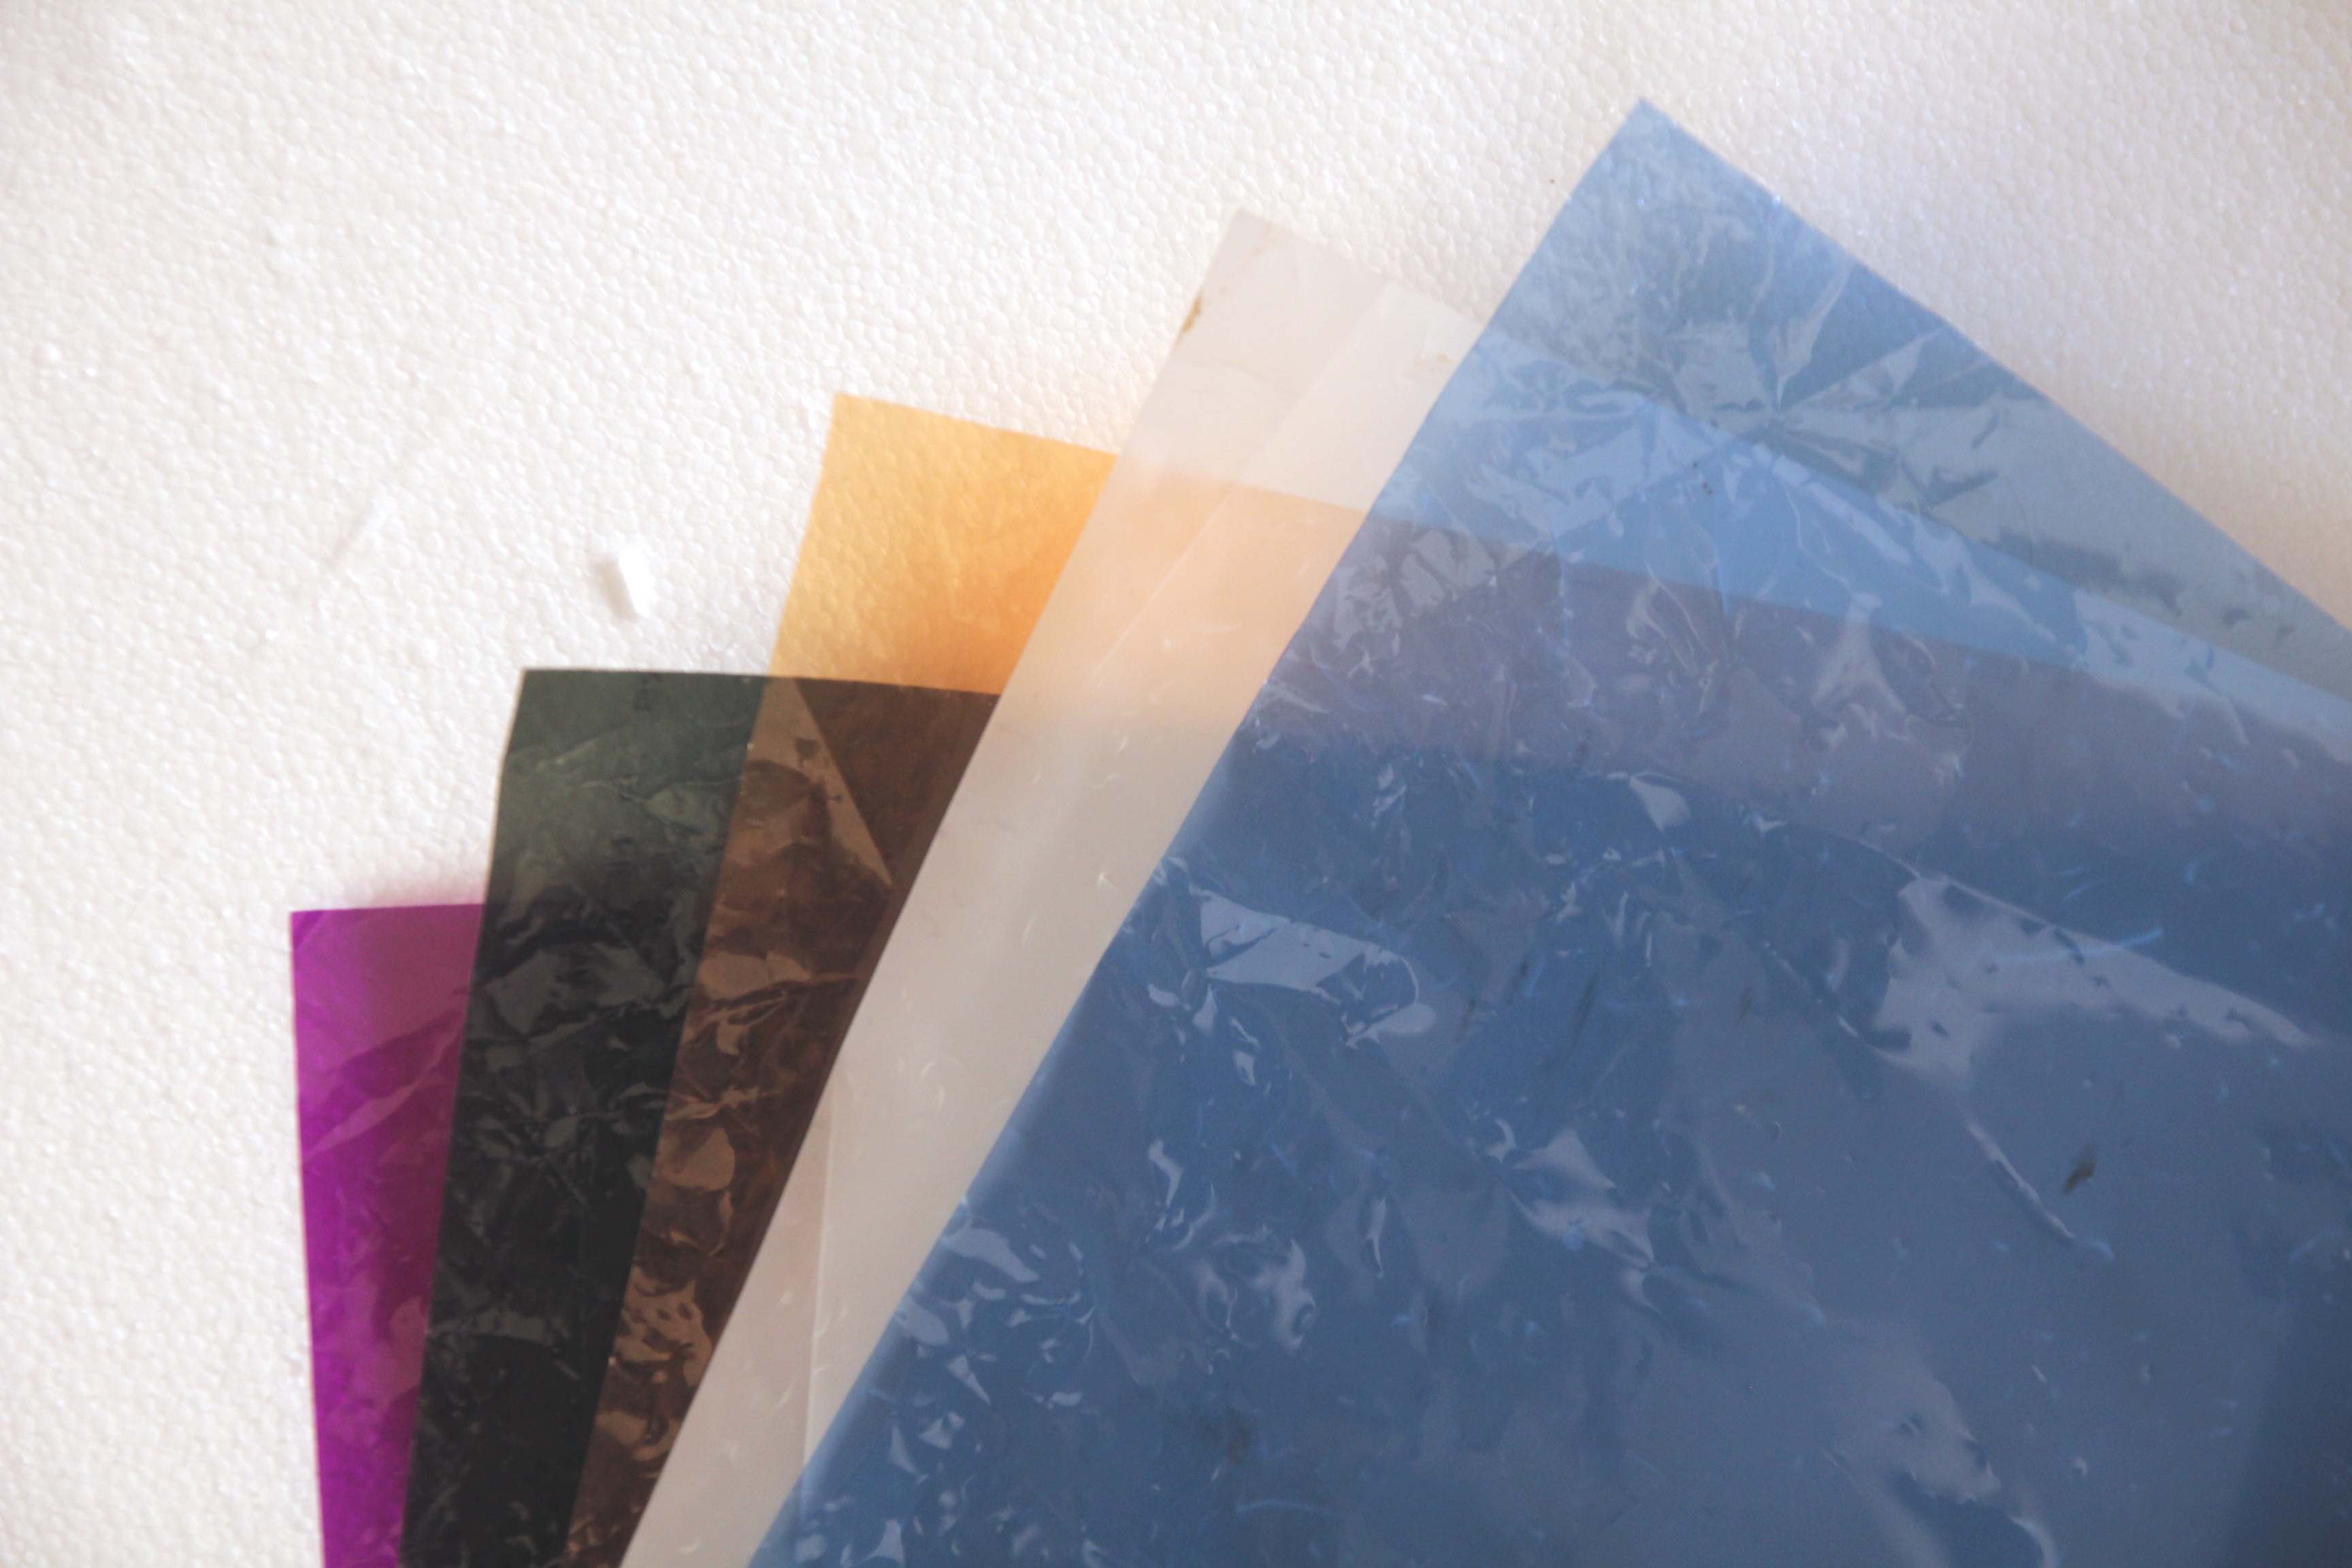
A beginners guide to lighting gels
Gels are used by cinematographers and videographers to balance the colour of light sources, adjust contrast and control shadows. It is the use of these gels that helps to create certain moods and looks to productions, whether that be low key drama or high key corporate video.
If you don’t know your ND from your CTB then read on as I introduce some of the most popular lighting gels and demonstrate how they may be used in your productions for creative effect.
CTB
CTB (not to be confused with CBT!) stands for colour temperature blue and is often referred to simply as ‘daylight’. It is used to convert tungsten balanced light sources such as traditional household bulbs and fresnels from 3200K to 5600K. It’s a common gel for balancing artificial light sources to daylight when the sun is acting as the key light in a scene.
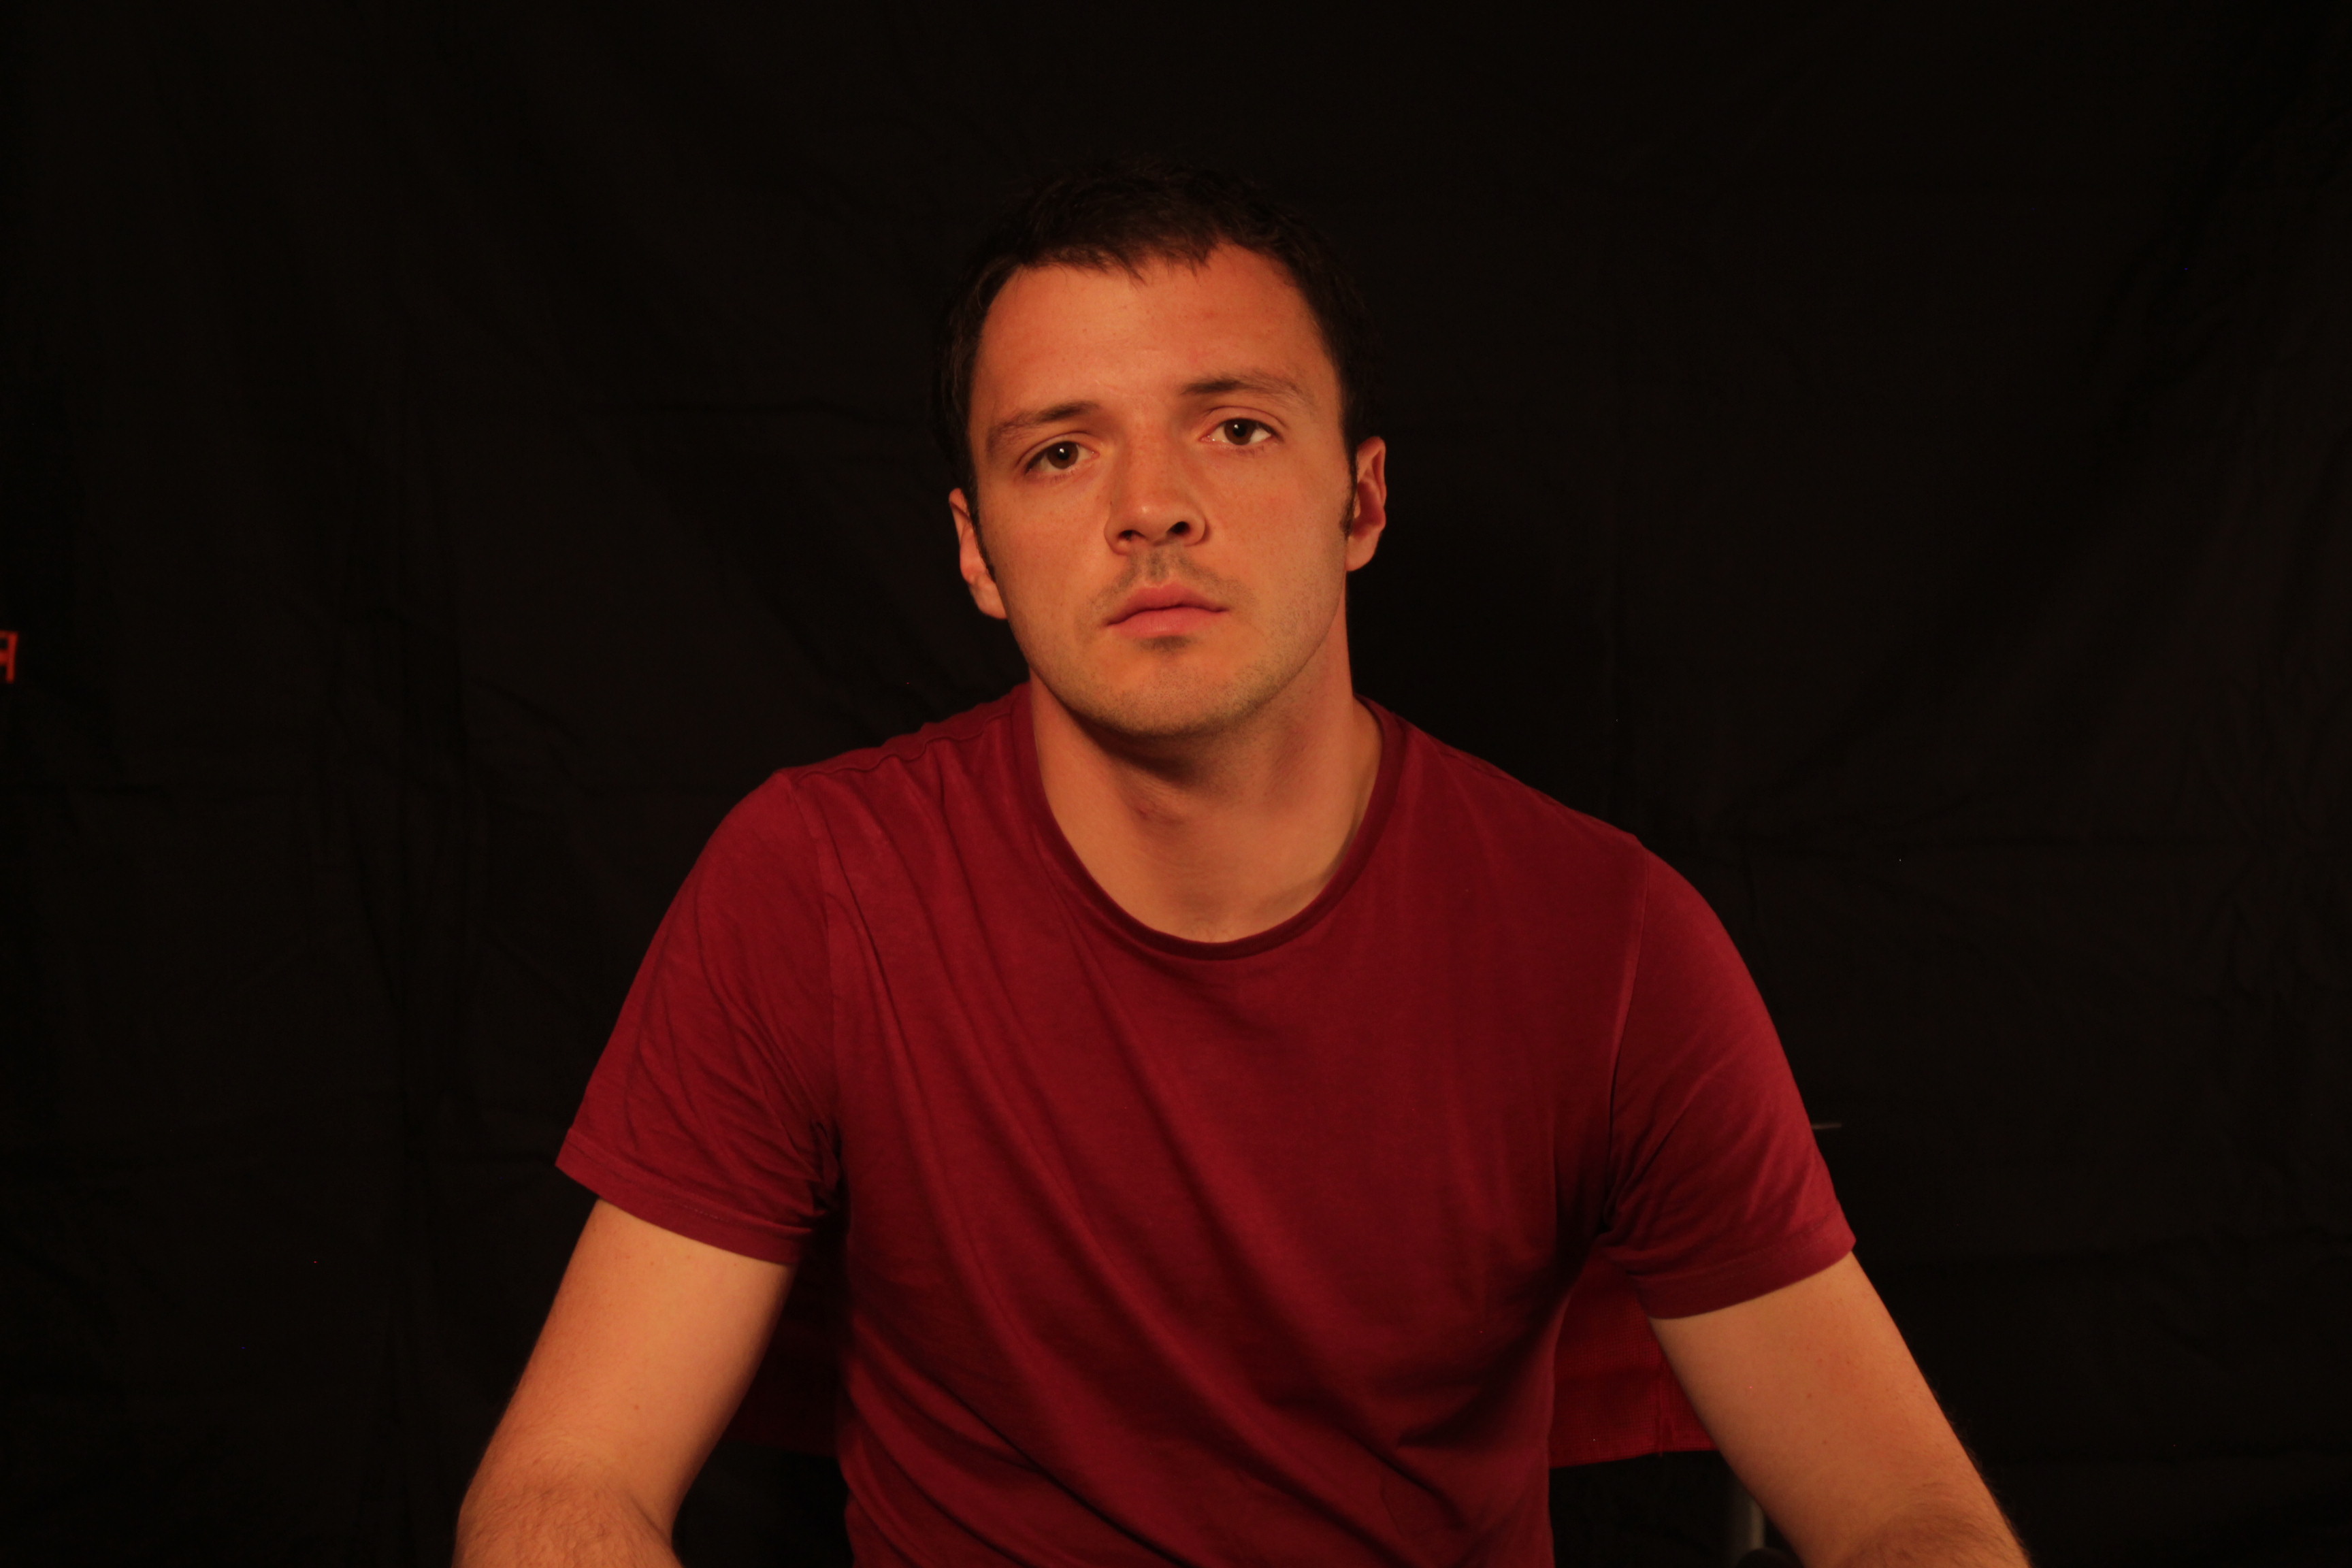
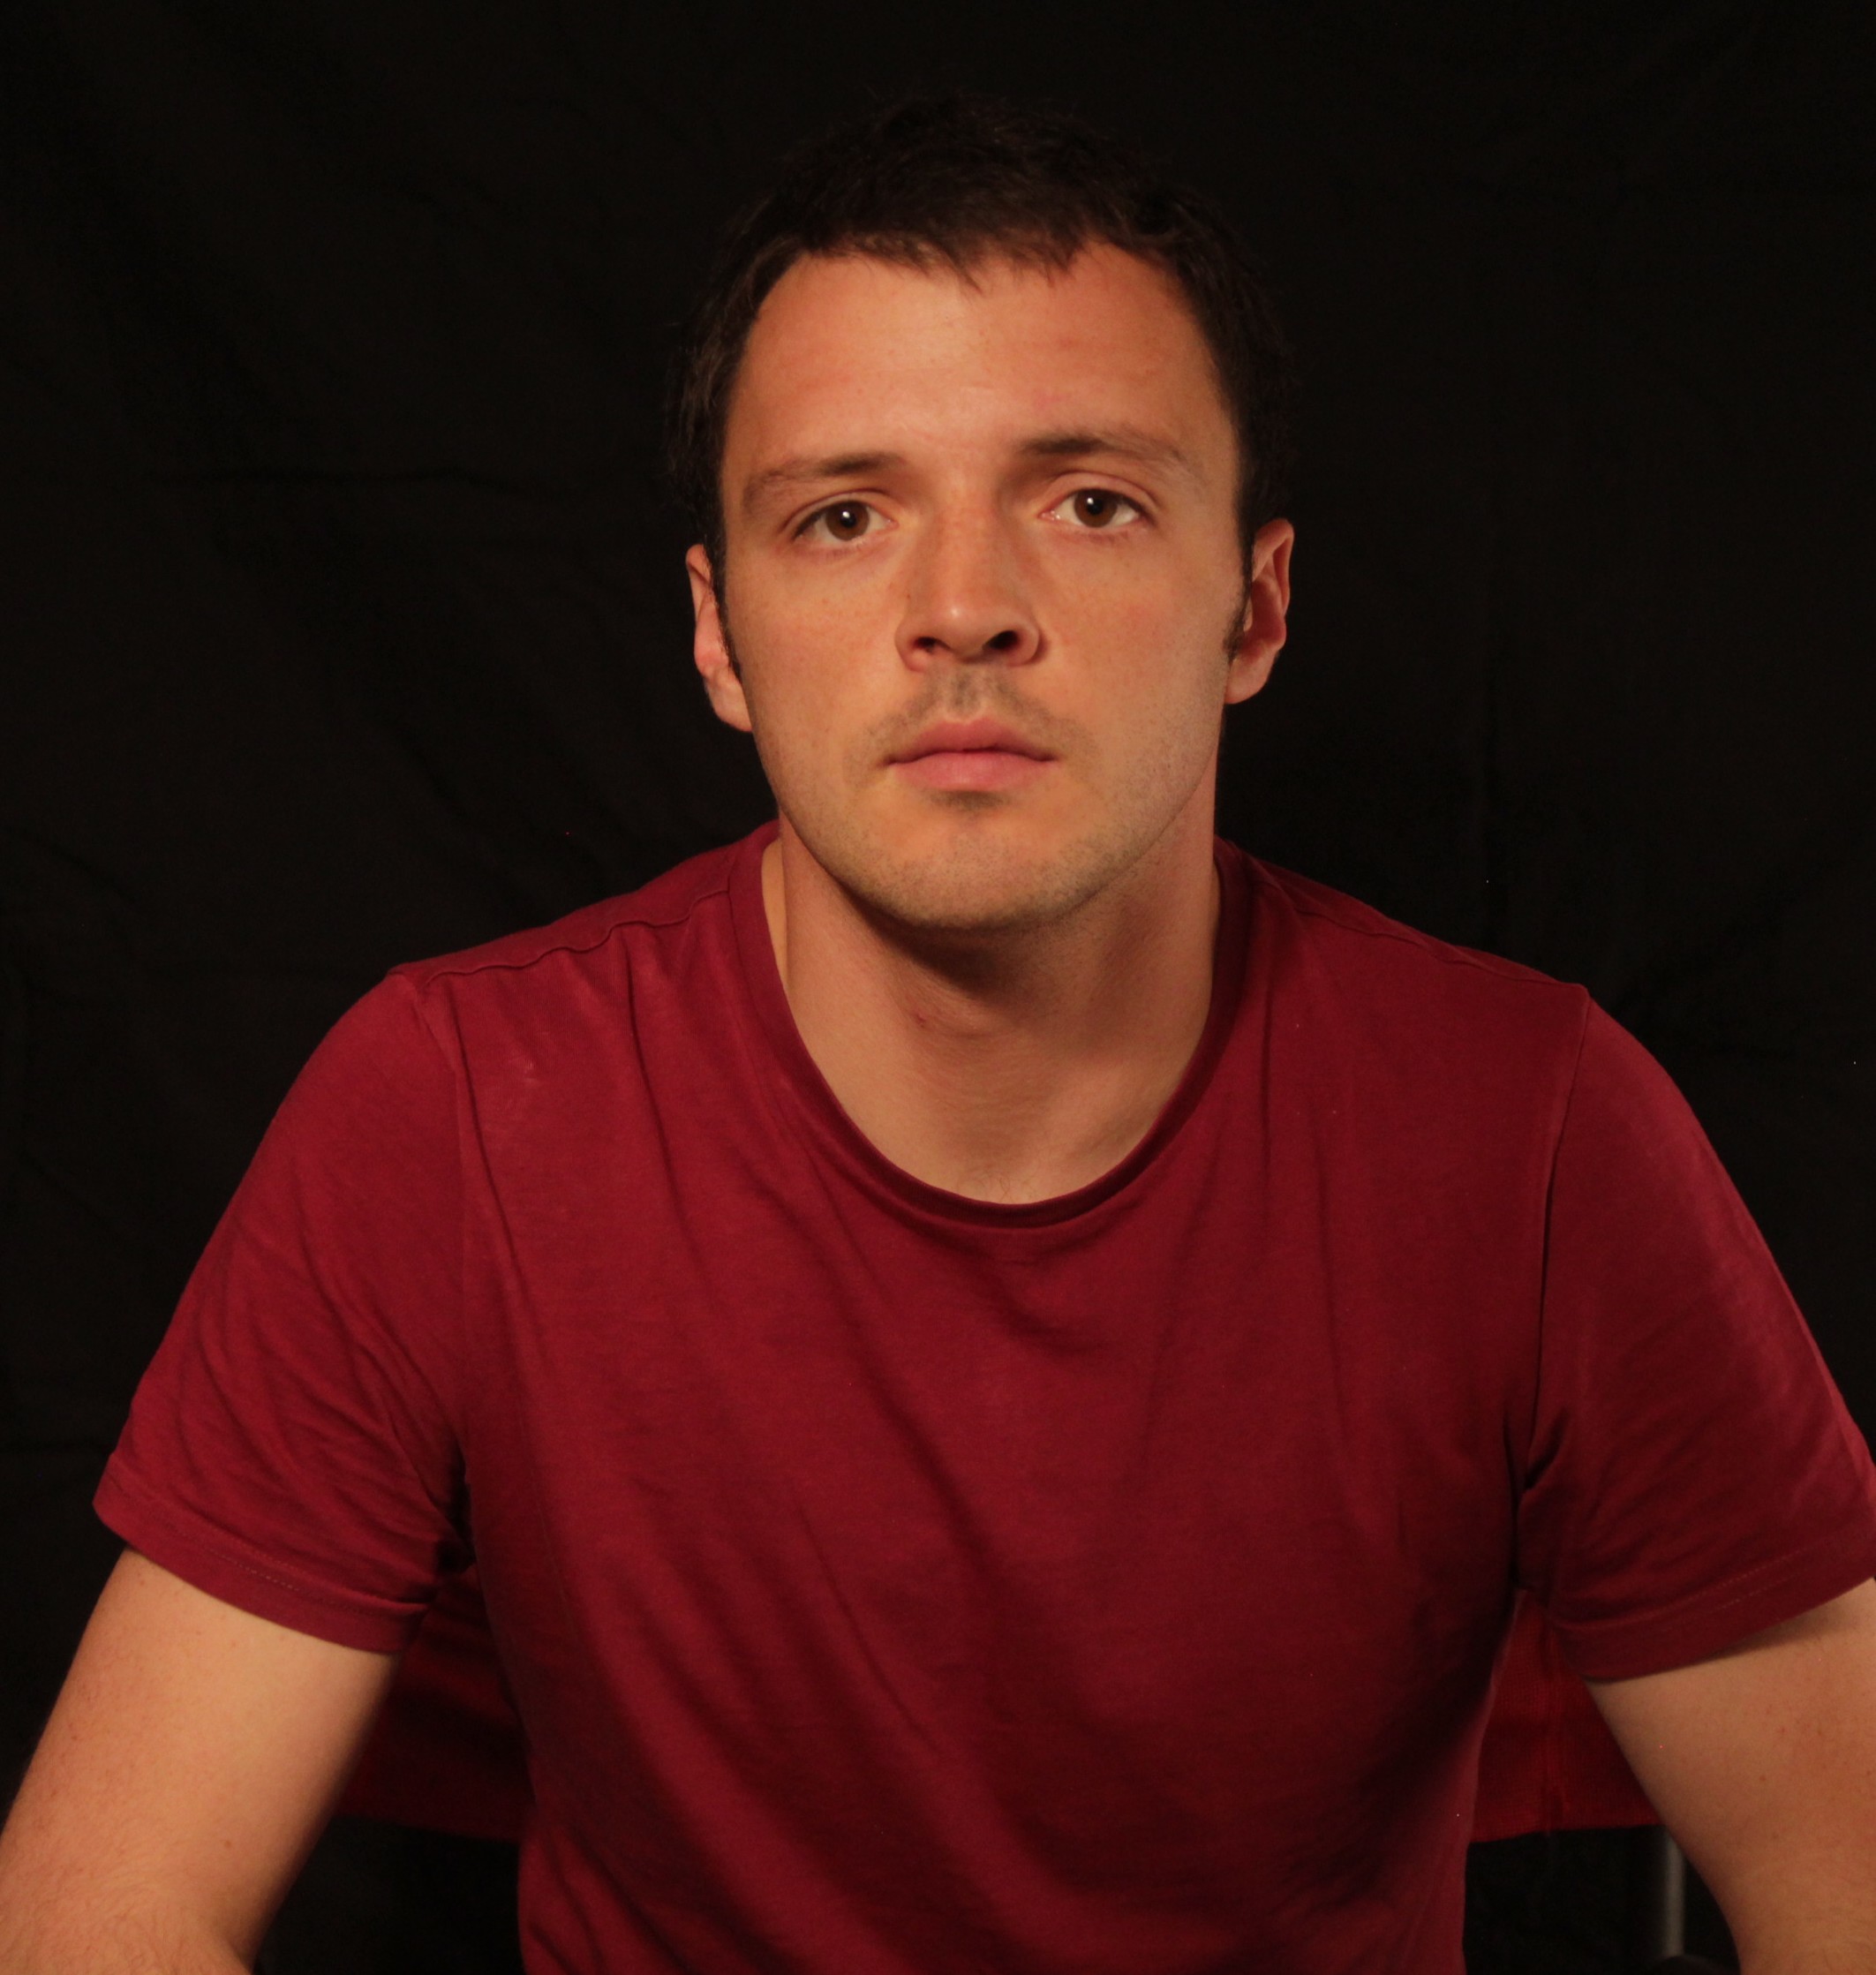
With our camera balanced to daylight and using a tungsten light source, our professional model looks like he should be in TOWIE..

..so by applying FULL CTB the skin tone looks a bit more natural now.
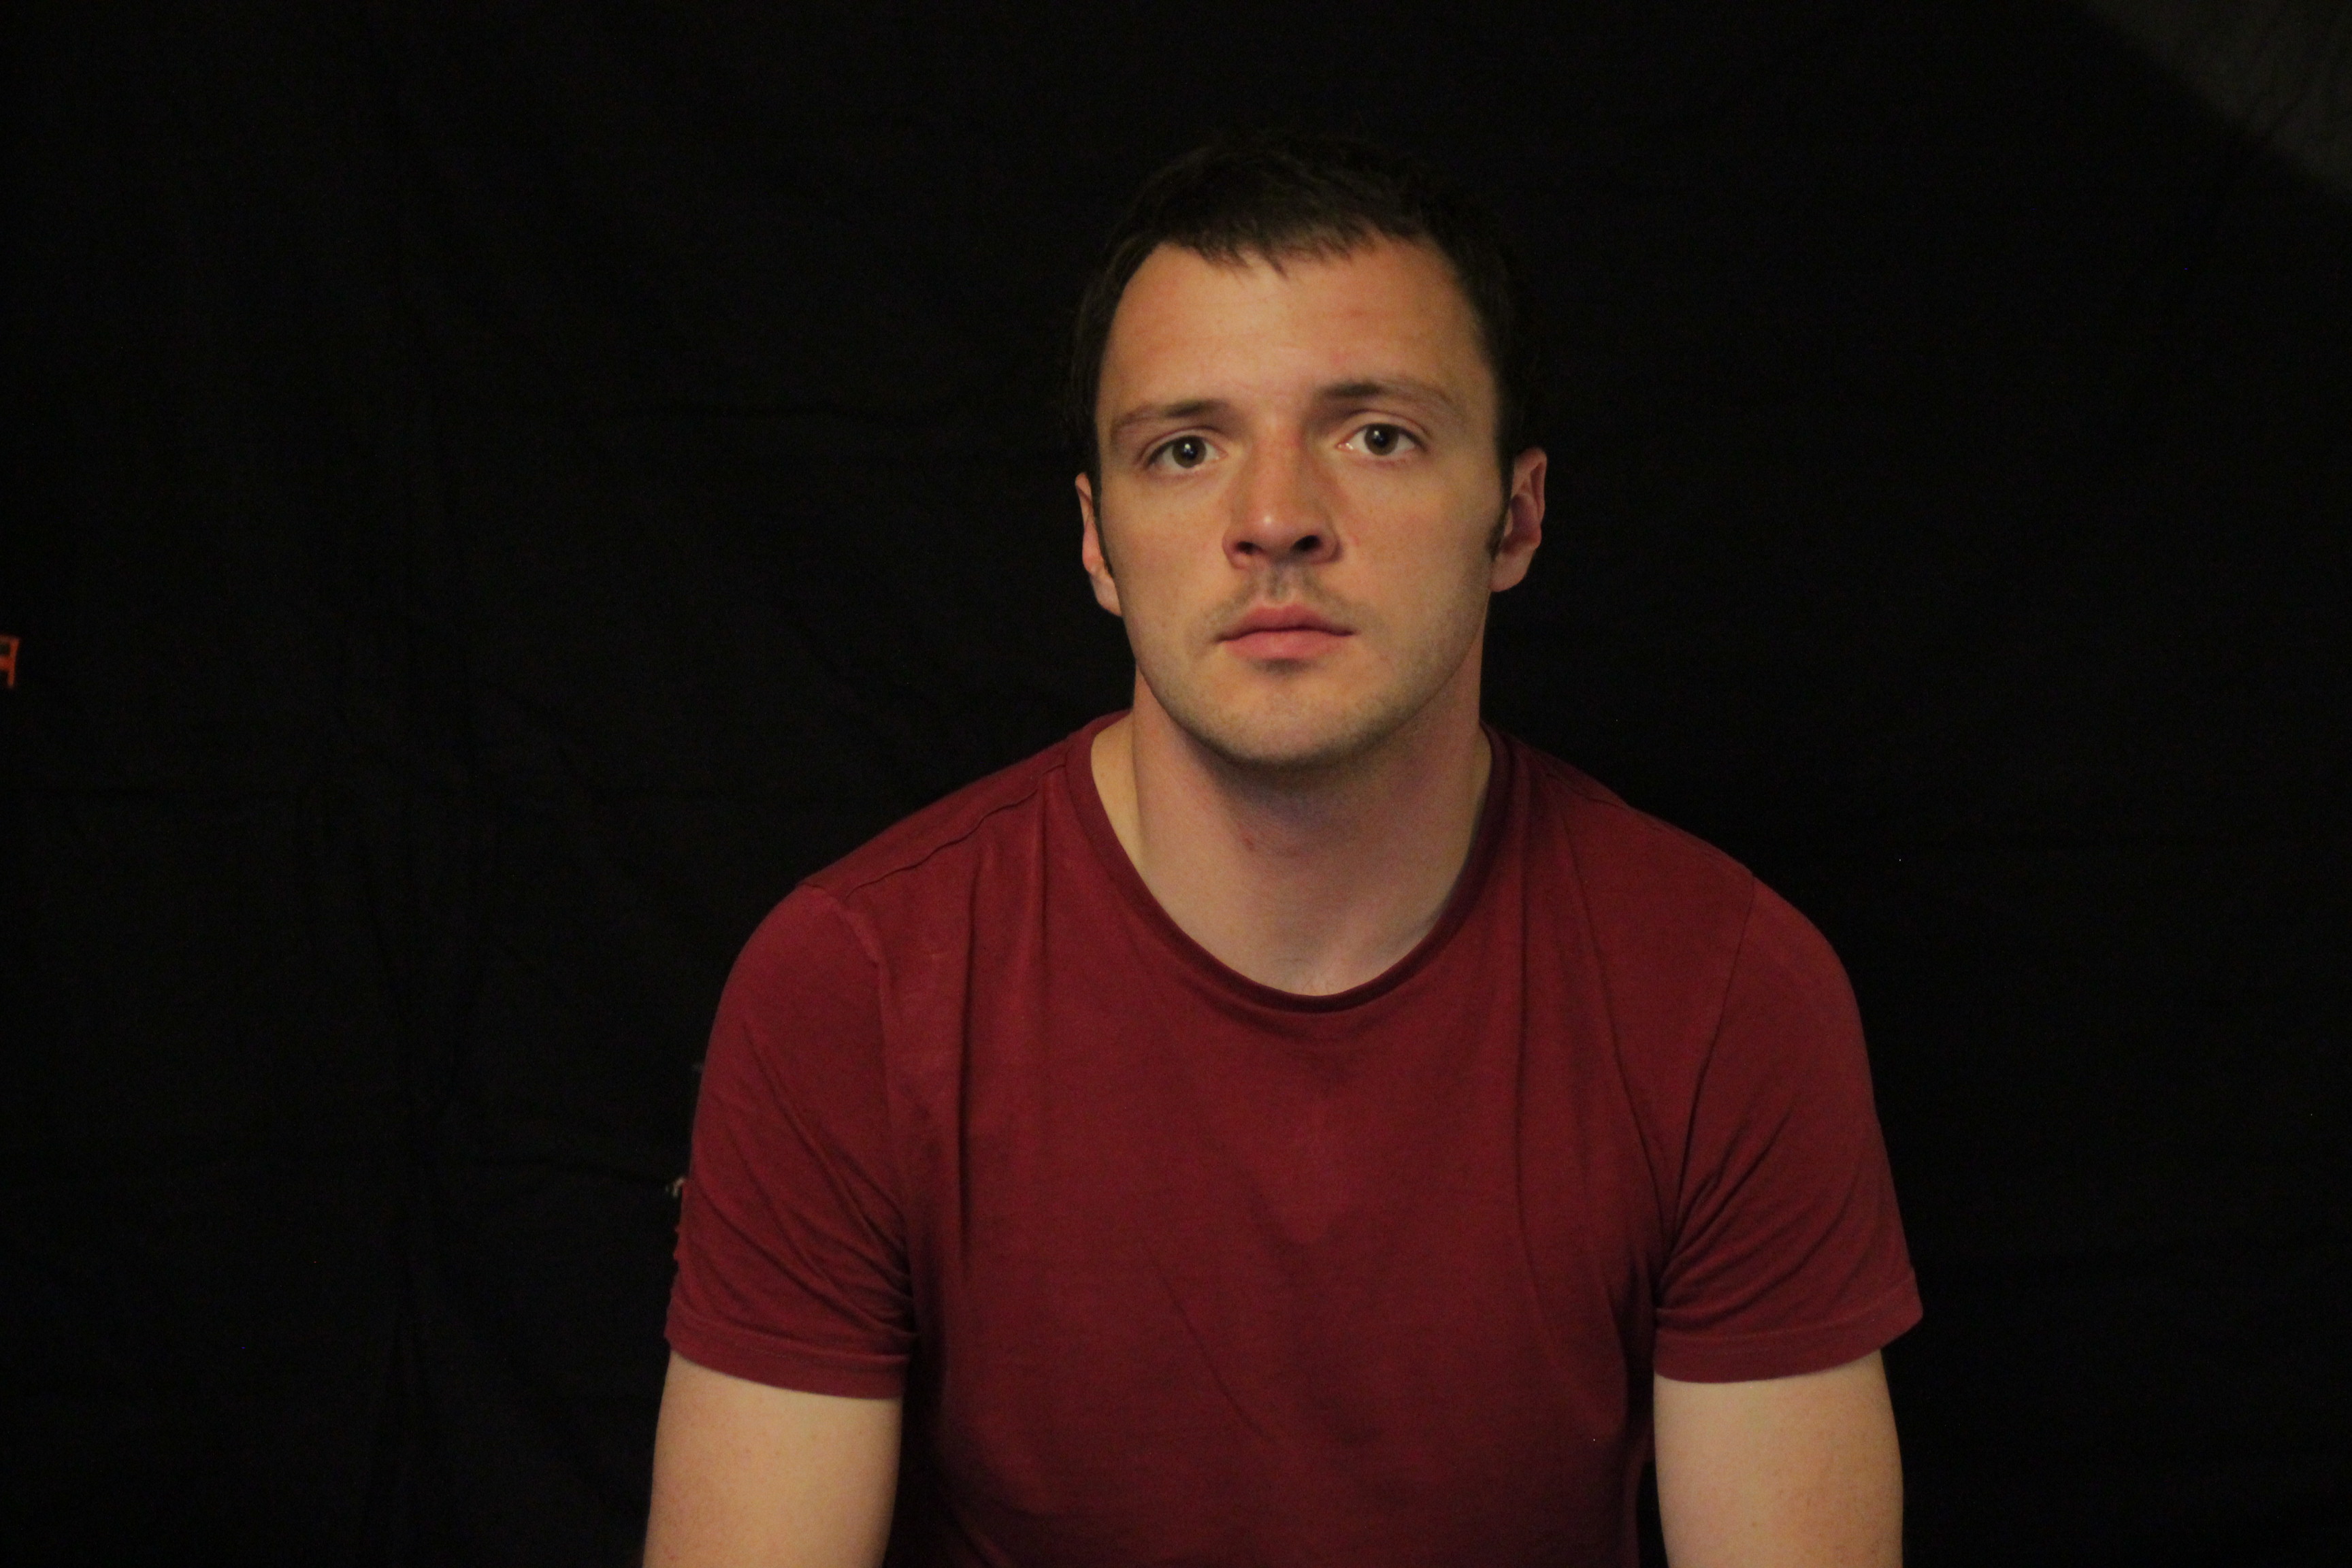
If your subject has a lighter skin tone or if your camera’s auto white balance reads around the 4500K mark (for some fluorescent lighting), you may want something in the middle between tungsten and daylight and HALF CTB may be your answer, converting tungsten sources to 4300K. In this shot the camera is still balanced to daylight.
-
CTO
Another popular colour correction gel is CTO which stands for colour temperature orange and is often simply referred to as ‘Tungsten’. It is used to convert daylight 5600K sources to 3200K, in line with the colour temperature of most traditional household lamps.

Using a daylight balanced LED light and with the camera balanced to tungsten, our image is looking a bit cold. But there is a use for this though; it is a popular method of simulating moonlight as well as shooting ‘day for night’.
But if moonlight isn’t what you’re after, FULL CTO will return the skin tone back to a more natural colour.
HALF CTO converts 5200K to 3800K, so a little cooler than FULL CTO but not too far off. With the light I’m using (dedolight ledzilla) and the model’s skin tone in this case HALF CTO actually looks a little nicer.
Both CTB and CTO also come in other strengths including QUARTER and EIGHTH, for those more subtle differences, but FULL and HALF are the most widely used.
-
ND
ND stands for neutral density and is used to reduce the amount of light without altering the colour. ND is often used on the camera in filter form but for lighting it can be invaluable in helping to control exposure and contrast. Using ND to reduce powerful light sources that do not have dimmers (or if you don’t want to change the colour temperature of the source through dimming) or stopping natural light from washing a scene out through covering windows with these gels, it is an incredibly useful tool.
Oh no, you can see that I forgot to iron my backdrop..so in this shot as you can see our model is looking a bit ghostly. Time to crack out the ND.
ND.3 reduces the light by 1 stop.

ND.6 reduces the light by 2 stops.

And ND.9 reduces the light by 3 stops.
Wise words a gaffer once said to me, “you can never have enough ND!”
-
Diffusion
Diffusion is used to control the softness of shadows and the softer the source the less prominent the shadows will be. As hard lights have typically much higher output than soft lights, diffusion is key to softening these sources whilst utilising a strong beam.
There are so many different types of diffusion available and it can be difficult to know where to start so here are a few examples to give you an idea of the range available. At the end of the day it’s down to you to experiment with various types and find what you like.
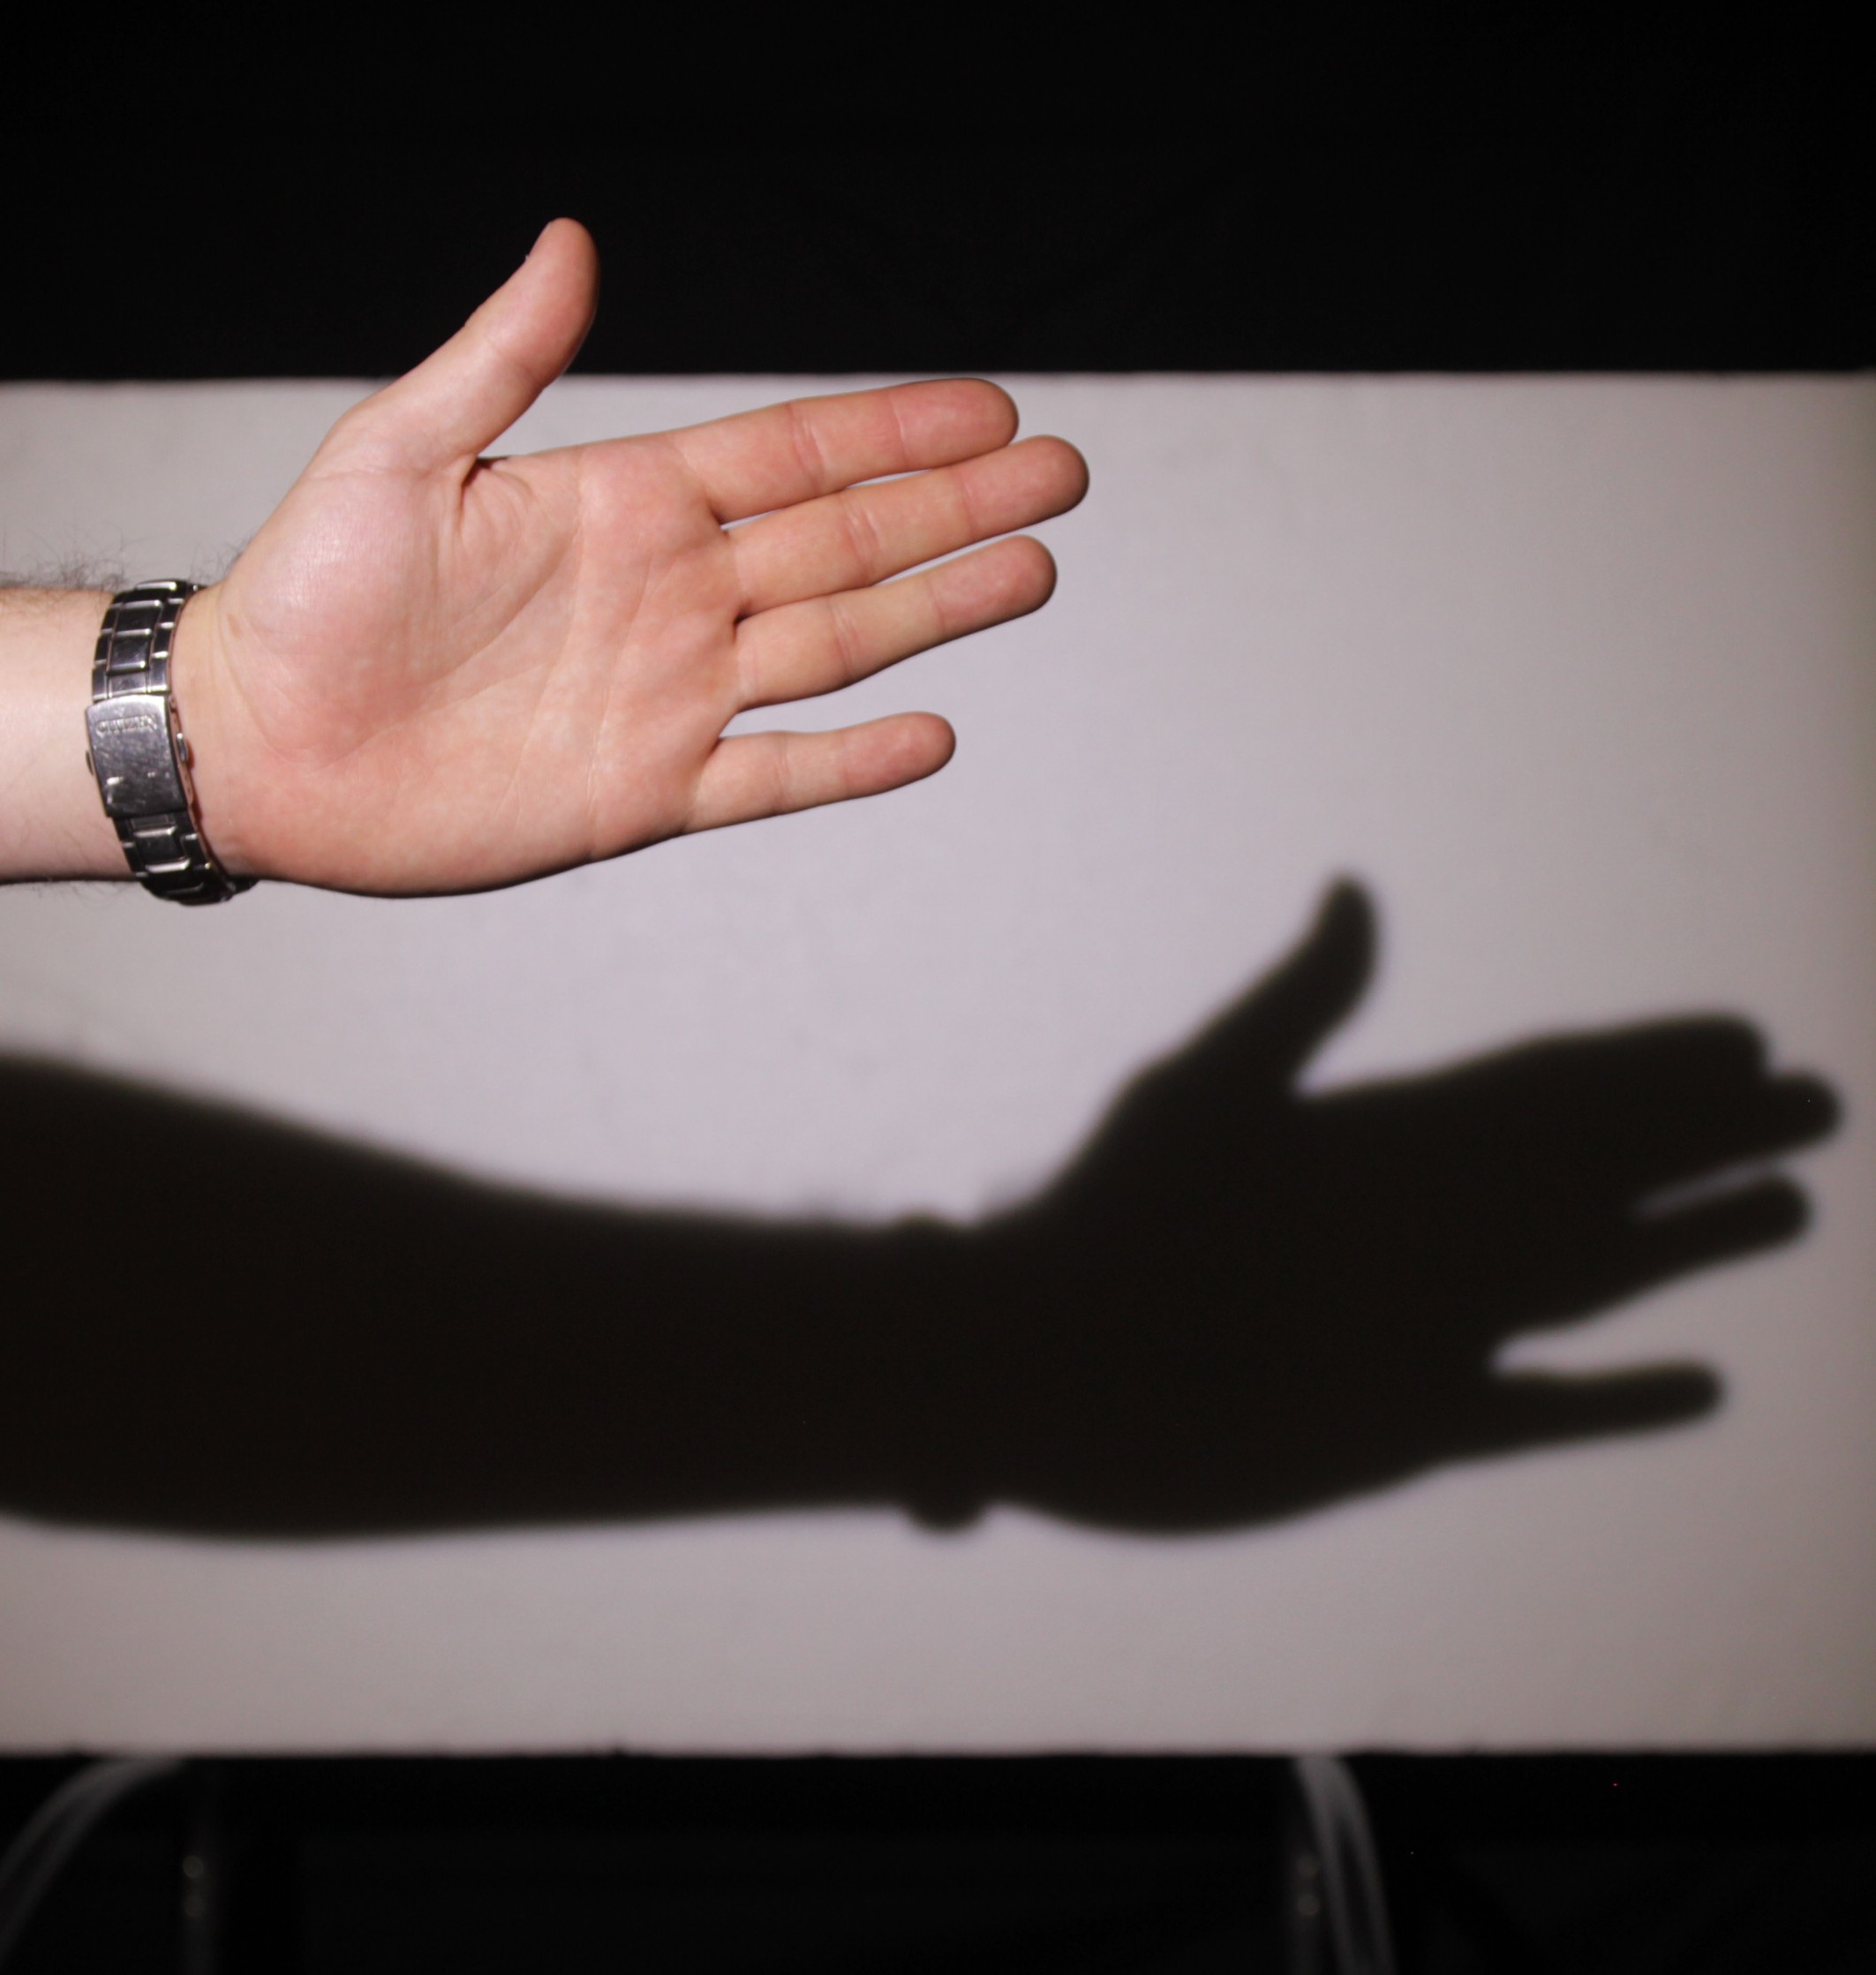
Our professional hand model is currently being lit with a hard LED source (Dedolight Ledzilla) and no diffusion.
This diffusion used here is HAMPSHIRE FROST. Notice a subtle softening of the shadow.
HEAVY DIFFUSION is being used here (and it’s easy to see why it got this name)

I don’t actually know what this diffusion is called but it somehow found its way into my kit. A thicker, rougher sheet that is a little closer to greaseproof paper. As you can see it has a lovely texture to it and can add a bit of spice to a background.
It’s important to note too that the further a piece of diffusion is away from a light source, the softer the shadows will be, as will be a slight reduction in overall output of the light. See the example below:
HALF DIFFUSION attached to the light..
..and the HALF DIFFUSION moved away from the light source (closer to the subject). Notice how much softer the shadow is now.
- “Party” gels
Not necessarily an official term but in this case I shall refer to most other coloured gels as ‘party gels’. Whilst these may not be as important for most shoots as the colour correction and other gels mentioned above, they can be used to create certain moods for your scenes whether they are used as key lights, backlights or kickers. There are an almost endless number of these gels to choose from but here are a couple of examples.
STEEL GREEN with the camera balanced to tungsten. Sci fi!
STEEL GREEN but with the camera balanced to daylight. Lord of the Rings or Matrix?
More subtle than the above, a STRAW lighting gel with the camera balanced to tungsten. A nice morning light look.
A STRAW gel but with the camera balanced to daylight. I’m getting a CSI Miami vibe here.
So, which gels should you buy?
It all starts with the light source(s) that you’ll be using most. Their colour temperature, power, whether they are dimmable and how hard or soft they are will all determine the gels you need. Aspiring DOPs will probably accumulate gels over time as their portfolio grows, but a good place to start is with the simple colour correction gels (CTO and/or CTB) and some diffusion which are the bare bones for lighting anything professionally. Another thing, don’t always rely on kit hire companies to stock a wide range of gels!
Experimenting is key to finding lighting styles that will grab your audience’s attention.
Part of the fun and the craft of being a DOP is finding lighting styles that fit your productions and consequently help you to create your own signature style. Experiment with gels and see which colour combinations work and which don’t. Get creative!
Whether you are new to lighting or not, the LEE filter comparison tool here is a fantastic resource to see the range of lighting gels available and help you make decisions on what to buy. LEE filters are widely considered the number one name for gels; heat proof, colour accurate and with a huge choice available, they are an essential investment if you’re an aspiring DOP.
Happy shooting!
P.S. This post would not have been possible without my trusty light meter. Here are a few reasons why every aspiring DOP simply must have one.

So you shoot video…but can you do stills?
Many times I have been on a shoot and the client has asked if I can do photos too. Now I imagine this is a popular question for the majority of other videographers too but for me it has always been a bit difficult to answer. I’ll explain why.
Whilst it could appear that a digital professional who works in one visual medium would probably be competent in a similar one, the truth is that video and stills photography aren’t always as close to each other as many may think. In theory, anyone can take our their phone and take a picture and shoot some video with relatively no skill at all but most businesses wouldn’t choose this option if they wanted high quality content. Assuming that your photos and videos could be done by the same person is also not always the best thing if you want the highest quality from either, however it’s easy to see why those outside of the creative industries might pair the two up.
The reality is that the skills and experience required for the role of videographer and photographer are completely different, despite an overlap of certain techniques and equipment.
Hold on! There are some similarities..
Technically we – the video guys – can do your stills. The single biggest reason why is that we actually use DSLR cameras to shoot our videos! Using dedicated stills cameras for video may seem absurd but one of the main benefits can be that we have the ability get high quality images at excellent value. The Sony A7Sii and Panasonic GH4 are both good examples of DSLRs that offer 4K video capability at an affordable price and as 4K online video is still in it s infancy it’s not economical for the majority of us to invest in top of the range 4K video or cinema cameras so these types of DSLRs are sensible purchases. Adding to this, many DSLRs have large sensors meaning that they are exceptional in low light which is great for event videos and can offer cinematic bokeh (background blur) which can make videos look stunning. DSLRs are also perfect for shooting high quality timelapses which can add another interesting element to video content. With these considerations it makes absolute sense that online content producers have DSLRs at their disposal.
Shot composition, framing and an understanding of the technology behind the respective crafts are essential regardless of whether someone shoots video, stills or both. Colour temperature, exposure and shutter speed (or angle) are further concepts that must be grasped by either professional.
A whole lotta’ differences..
Apart from the obvious one that videos are moving and stills are not, there are actually many other less obvious differences between the two which maybe mean no, us videographers can’t (or choose not to) do your stills.
Motion from the camera or from the subject helps to make a sequence more engrossing.
It boils down to the key ingredients for each craft which are in turn, completely different. Video needs motion, whereas photography is all about light (well actually, premium video is about light, which I talked about in an earlier article but the absolute bare bones of video production is motion). Successful business videos engage with an audience, encouraging them to react (i.e. with a like, share or comment on social media) and to help with this motion is essential to keeping their attention. Even if the subject isn’t moving a cut to another angle can be enough to create at least an element of movement. Sound is the other key skill in video production that often gets overlooked but it really is an art in itself.
Landscape photography – being in the right place at the right time..and having a bit of patience!
Photography however is all about capturing perfect moments in the best light, whether that be using natural or artificial sources or a combination of the two. Capturing a single moment that’s sharp, interesting and exposed well is an entirely different art to shooting video and for a picture to paint a thousand words, it has to be something special. Landscape photography is a good example of how difficult it can be; to get the perfect image photographers may have to wait for hours to be in the right place at the right time in order to capture the best natural light.
The post production process can be drastically different too. Photographic editing often involves retouching, fine adjustment and layers upon layers of edits even just for a single image. Car photography in a studio is a good example; to make the various parts of a car look perfect all at once each part has to be lit separately and all of the images blended together in post production to only show the best bits from each setup. Whilst this can happen in video too it is much more time consuming and processor intensive as multiple layers of correction would require key framing (and bearing in mind that PAL video is made up of 25 frames per second, that’s a lot of frames to consider!) and so only suitable for the highest end projects.
“Could you take a still image from the video?”
Another question that I get asked often. Yes, this is possible, however as the majority of online content is shot in HD, not 4K, doing this means that you will have a smaller resolution image than you would have done if you had used a designated stills camera (and not in video mode). Megapixels are more important in photography than video for sure and as a result many camcorders will have a much lower pixel count, plus if there is any movement in your video taking a still frame might leave you with a subject that’s got a bit of motion blur. For some web purposes it may be fine extracting a smaller image from a video (including in a blog for instance) but if you wanted to zoom in, enlarge the image greatly or print it professionally then it wouldn’t be a suitable option.
So in practice yes, but if you want the best quality then no.
Wedding shooters: similar equipment, different style.
5Dmkiii – a popular choice of camera for both wedding photographers and DSLR videographers
A good example of the differing styles of a videographer and a photographer would be at a typical wedding. The photographer will be capturing the key moments of the day but will also be herding the guests so they can set up and take memorable portraits that can be cherished forever. With only one opportunity to get these people together they are very much in the limelight during certain parts of the day. They would certainly need to be a people person!
The videographer however will be the complete opposite; rather than being noticeable and central to the day they will most likely be blending into the background so that they can go unnoticed. They would capture the day but not intervene with the order of events so that when the happy couple come to watch their video back they actually see the day from a whole new perspective. Events can be unpredictable so being able to foresee what’s coming and then be able to simultaneously capture the best audio and visuals is something that can take years of mastering.
Canon C100 – where stills and motion overlap. A camcorder that uses interchangeable DSLR lenses.
The editing styles of each wedding shooter role differ immensely too; the photographer will spend days editing potentially hundreds of photos whereas the videographer will most likely be editing in camera, shooting as linearly as they can on the day to keep the editing time affordable and sustainable in the long term. This is especially important as data processing could take almost as much time as the editing itself due to the large file sizes involved and the process of burning the final (often hour long or more) videos onto multiple DVDs for clients.
The bottom line
Don’t get me wrong, there is absolutely no harm in offering both video and photographic services but the point of this post is that there are different skills, workflows and to some extent, even personal qualities that can be applied to each craft and more often than not the best practice is to hire the relevant specialist. On the contrary, many experienced cinematographers in film production have backgrounds in stills photography, as do many photographers venture into video production, so there is no set rule. At the end of the day it certainly can’t hurt to have an interest in both fields but knowing and being honest about where your strengths and weaknesses lie is vital when it comes to maintaining strong working relationships, regardless of the industry you work in.
So if we were to answer to the original question: “Can you do stills?”, well yes; here at Mustard we rely on a trusted network of talented freelancers with a range of talents to assist us in fulfilling our moving image and other digital needs. If we can’t personally meet your requirements then we’ll certainly be able to recommend you a trusted professional.

7 DIY lighting essentials for low budget filmmakers
So you’ve raised the finance for your project, chosen your camera, cast your actors..and you suddenly find that your budget has disappeared in a flash. Where did it all go? Film making can be a seriously expensive affair and sadly certain departments sometimes get neglected as a result. Lighting is one of these departments.
No matter how low your budget is, lighting should never be neglected if you want to create cinematic visuals to be remembered. In fact, here are a list of reasons why good lighting is so important. In this article however I’m going to identify 7 lighting essentials that don’t cost the earth but every low budget camera operator or DOP should be armed with. Sometimes you need to spend good money on kit and sometimes you don’t, but if you’re keen to increase production value economically then read on.
- Gaffer Tape
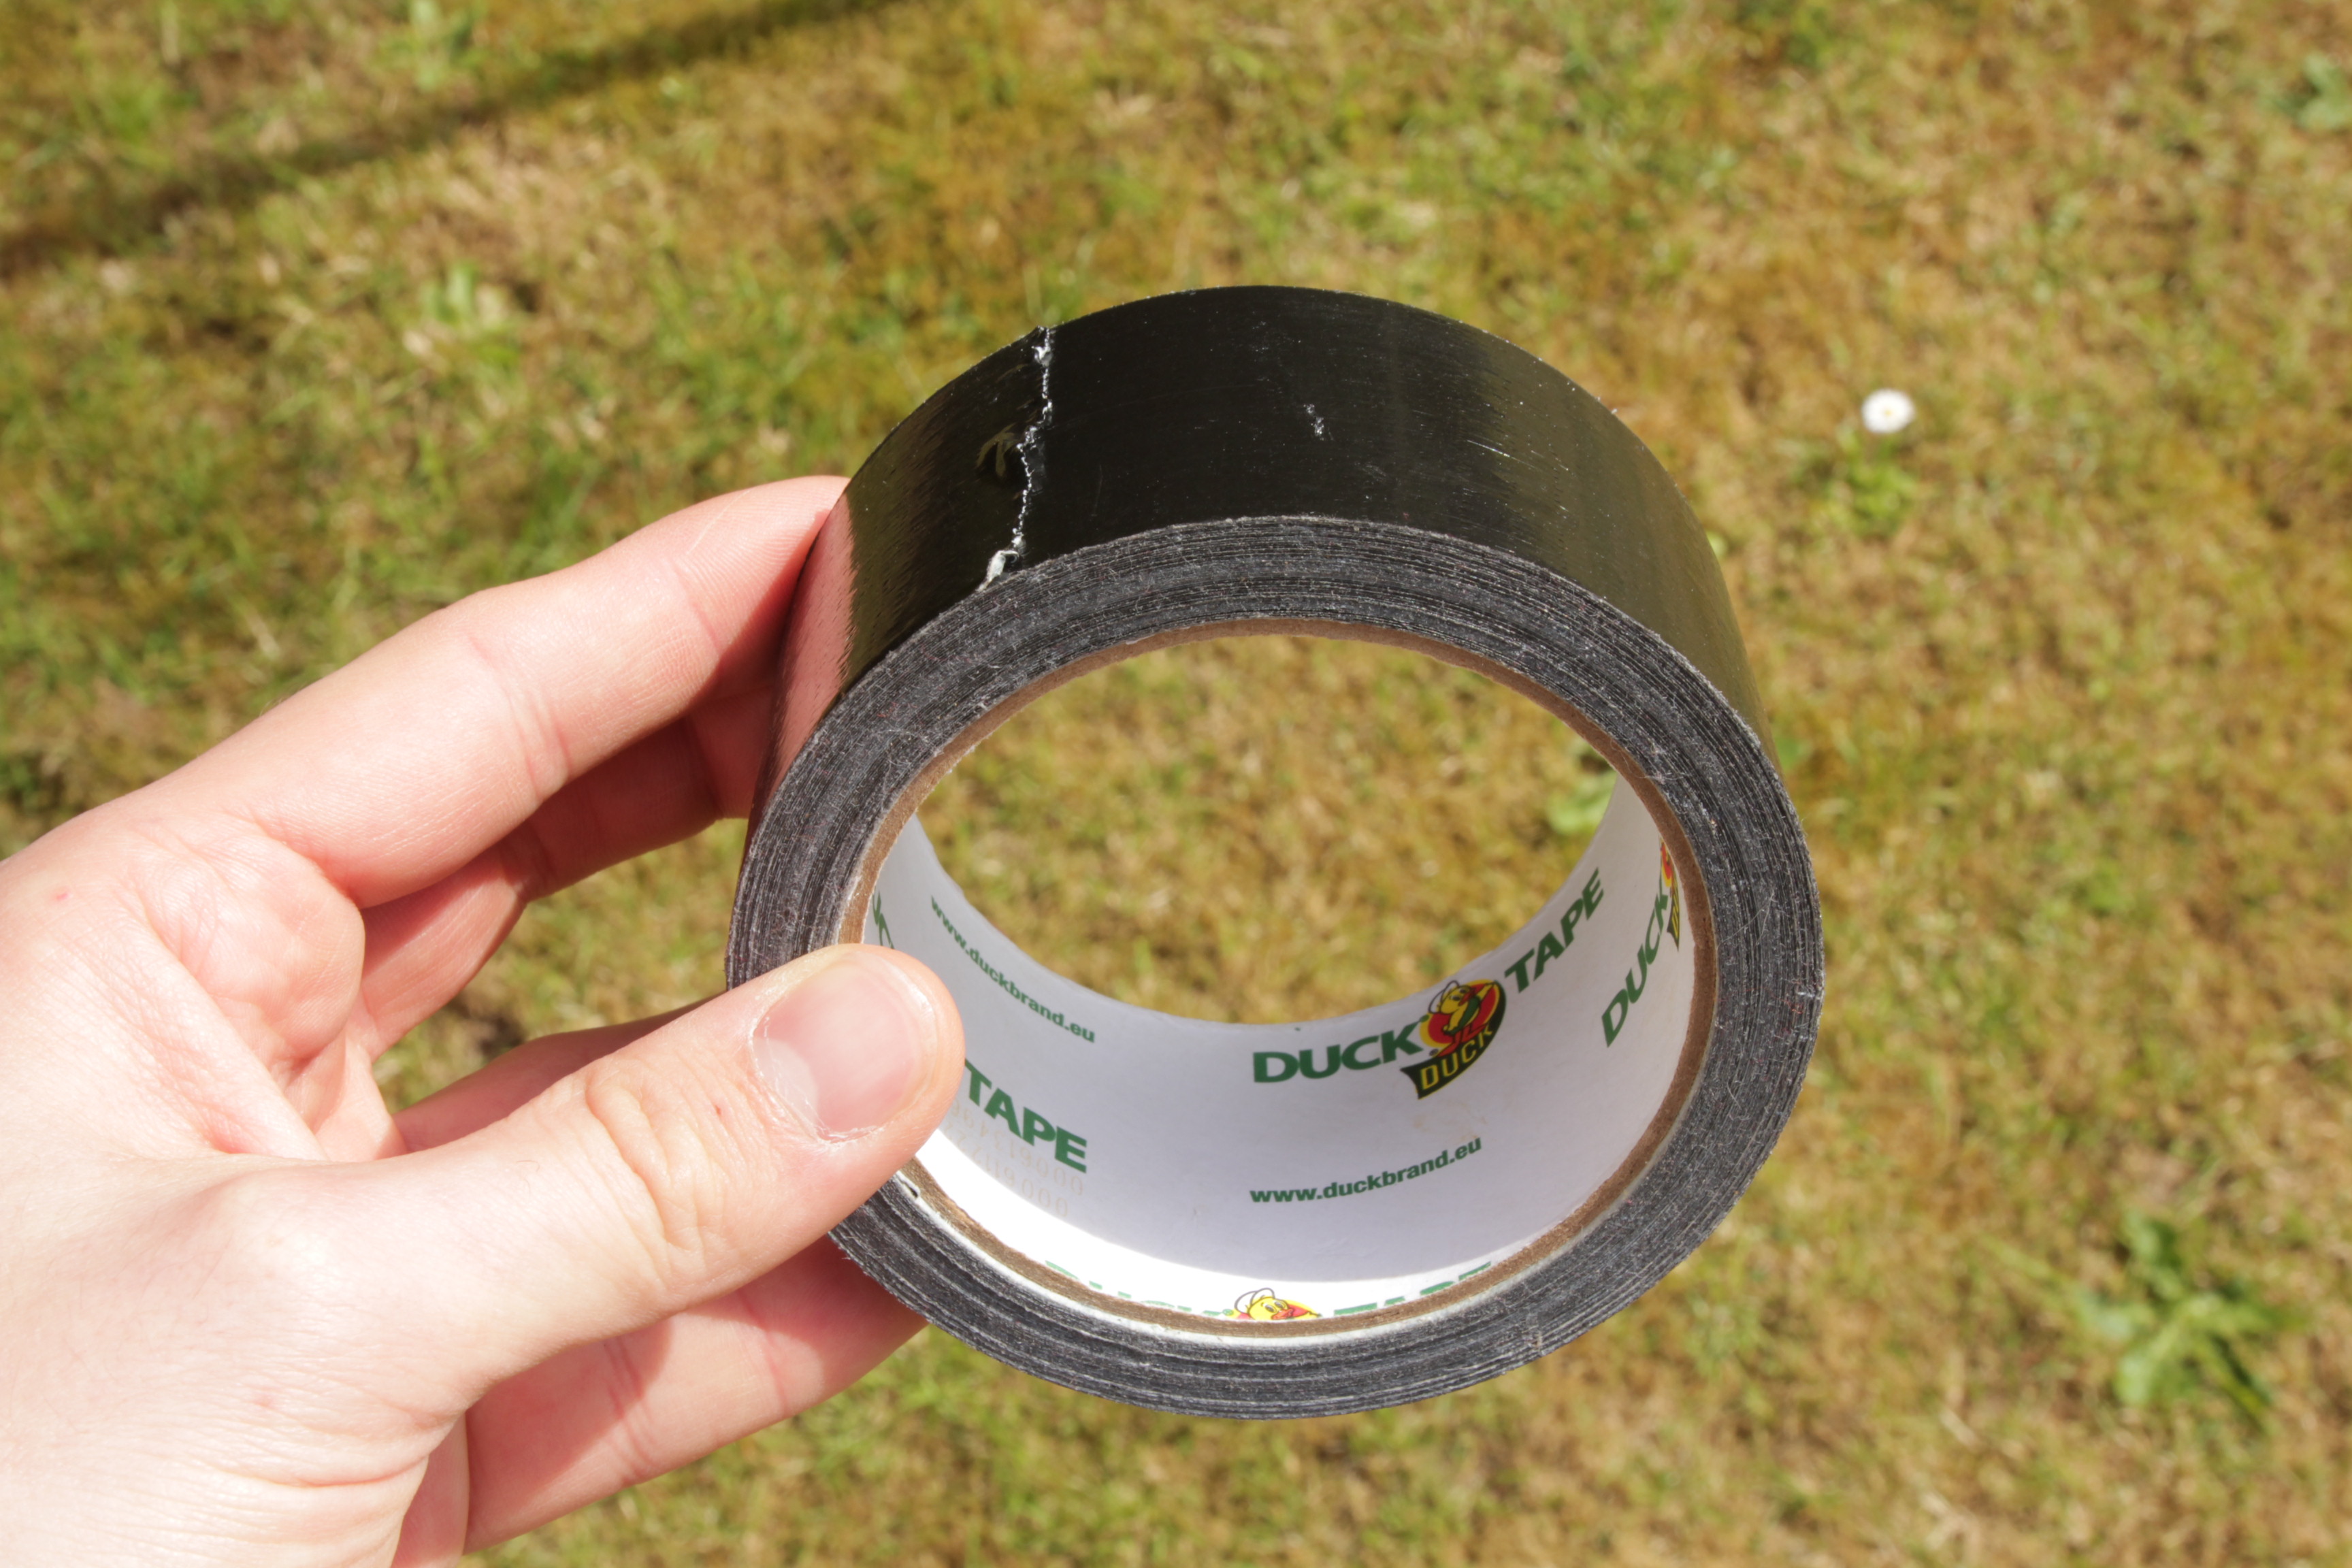 A ridiculously obvious one but gaffer tape is something that should go with you on every shoot no matter how big or small your budget! It can save your life (in a creative emergency, I have yet to prove this medically!), whether it’s used to rig lights or modifiers onto unusually shaped objects or into areas that are inaccessible for light stands, gaffer tape really is essential. It can also be used to make DIY french flags to avoid lens flare and teamed up with some trusty cinefoil/blackwrap makes a perfectly functioning LCD cover for operating in bright sunlight. Trust me, don’t leave this behind!
And the award for best DIY rigging solution goes to..
Gaffer and cinefoil = budget french flag. Cinefoil is one item you can’t afford to be without on set. This, along with your gels is worth spending good money on.
- Halogen work light
Revealing an ind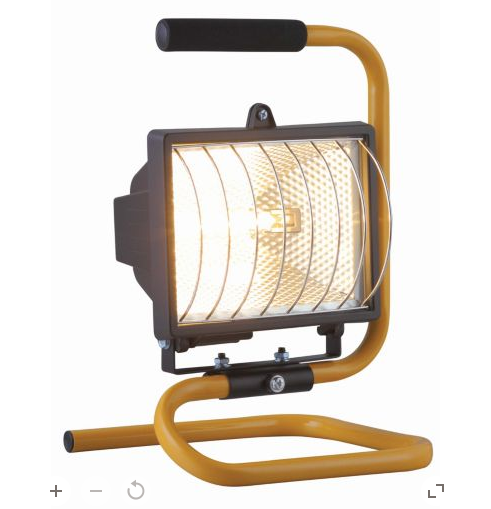 ustry secret here. Or maybe not. This item is ridiculously obvious and cheap but the likelihood is that most of us low budget filmmakers probably don’t use them..or at least not yet. If you pop down to your local B&Q you’ll find these useful halogen work lights. At about £10 each these little lights give out a fair amount of light considering their size and use tungsten balanced bulbs which means their colour temperature matches the expensive Arri equivalent. If you have the right colour correction gels then armed with a few of these you could in theory light your whole film.
Of course being cheap means that these little fixtures do have their drawbacks; short power leads, a lack of any way to control the spread of the light and the fact that they won’t attach to normal light stands are the main ones (because obviously film making isn’t what they were designed for) but, if you purchase one of these, and I recommend you get several, you could potentially fill decent sized spaces for little money. What’s more, their handles allow for easier rigging at height than some lights. With a bit of problem solving, and lets face it – that’s what film making mostly is, you’ll be able to find ways to rig, hide and control the output of these lights.
- Polyboard & foamcore

Polyboard is common even on the biggest of film sets
While you’re down at the DIY shop why don’t you pick up some of this too? Polyboard is a perfect and cheap way to bounce light in order to create flattering soft light and fill in shadows on your subject. It often comes in fairly large sizes and in various thicknesses and can be easily cut to size to meet your needs, or at least to fit in your car! What’s more, if you have any black paint lying around then paint one side and bob’s your uncle: you now have a large, lightweight flag to use for cutting light and creating negative fill. Two for the price of one (almost!).
 In addition to this your local craft shop will probably stock black and white foam core; both of which can be useful for smaller, more portable bounce boards and flags. Once again this is inexpensive, easy to cut to size and easy to rig. The only downside is any thin layers of card on these boards will be flammable, so be careful using them near hot light sources.
- Spring clamps
Top tip: buying multi packs on sites such as eBay can make these accessories even cheaper for you.
Cheap and cheerful, but where would I be without them? These large spring clamps are cheap, lightweight and a must have for anyone doing any sort of lighting. Use them to attach reflectors or boards to stands, flags and tarpaulins to backdrops and for making green screens taut. Do yourself a favour and get some now.

A quick way to hold up your reflector

- China ball lantern
A beautiful quality of light for certain applications.
China ball lanterns can create beautiful soft light for use in close ups and as practicals. Inexpensive and by using regular household bulbs, china lanterns are a cost effective option over the dearer branded soft fixtures and combinations offered by the likes of Arri and Chimera. They do have a specific use however, their main drawback being that regular 60W or similar household bulbs don’t give out huge amounts of light, at least not for cinema use. To the naked eye their light output is fine but on camera the lanterns reduce a bulb’s output a fair amount. Adding to this, their size and the fact that they’re made out of paper means significant fire hazards are present if too powerful bulbs are used, so you need to stick to the recommended wattage. For larger areas of soft light an Arri/Chimera combination is a much more suitable option which understandably you will need to pay for.
Despite their drawbacks if you’re able to find use for them still china ball lanterns can provide wonderful results. Rig them off C stands or mic stands, ensure you have long enough extension leads and you’re good to go. Watch out for that colour temperature though; some bulbs rate lower than 3200K (tungsten) so will appear warmer than you may like. Once again it pays to have a good selection of colour correction gels!
- Tin foil & baking paper
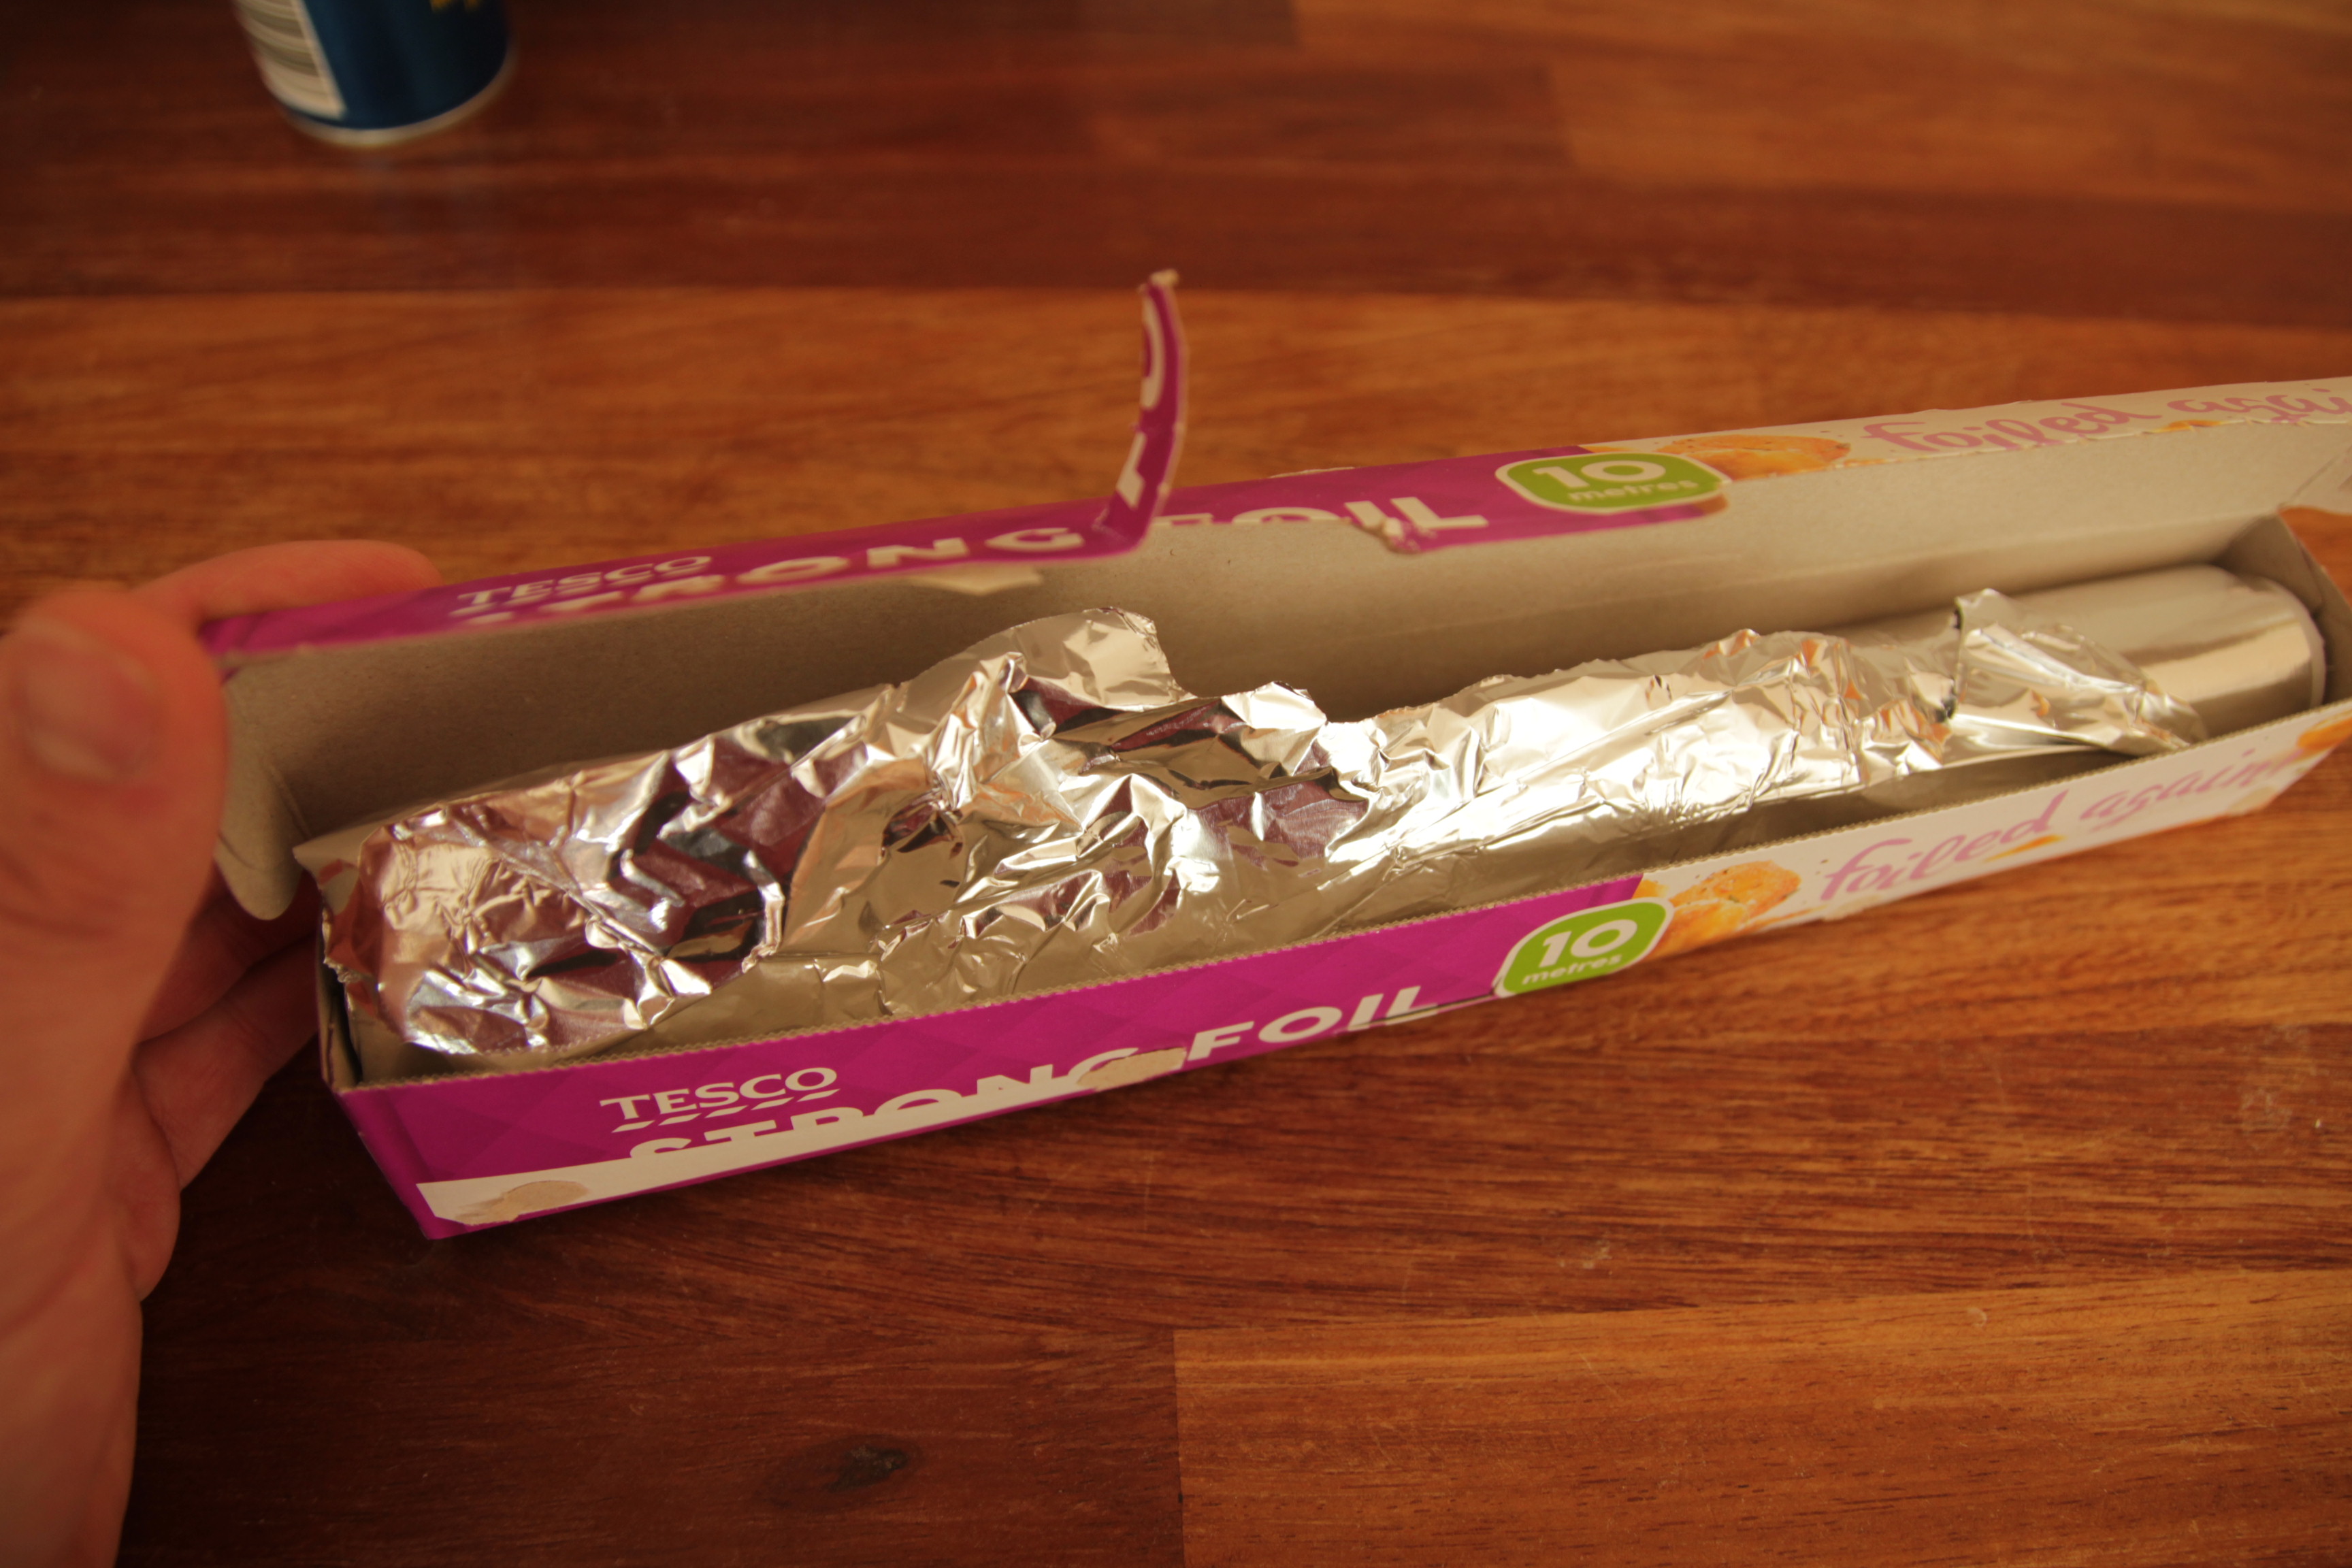
Tin foil: cheap as chips!
Who’d have thought that every day items around the home could help you in lighting your cinematic masterpieces? The highly reflective surface of tin foil can be used in the same way that the silver side of a reflector is used; to fill in shadows when a white surface isn’t cutting it or to create a bit of ‘pop’ to the image through introducing highlights. Attaching sheets of tin foil to your foam core boards (see above) or even just a sheet of plywood can give you another way of applying contrast quickly, cheaply and without having to hire anything!
No product placement here..
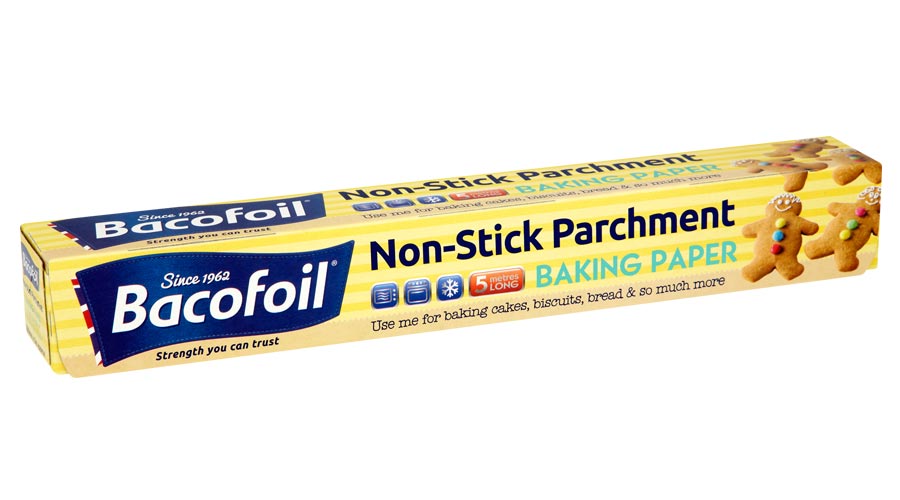
Baking/parchment paper is a good option for when you need to diffuse hard light sources to soften their shadows and reduce the contrast. It’s designed to withstand heat so is ideal for using with hot light sources without risk of burning. So if you’ve run out of diffusing gels and need a quick softening solution, go have a look in the kitchen cupboard or run to the shop!
- Tarpaulin
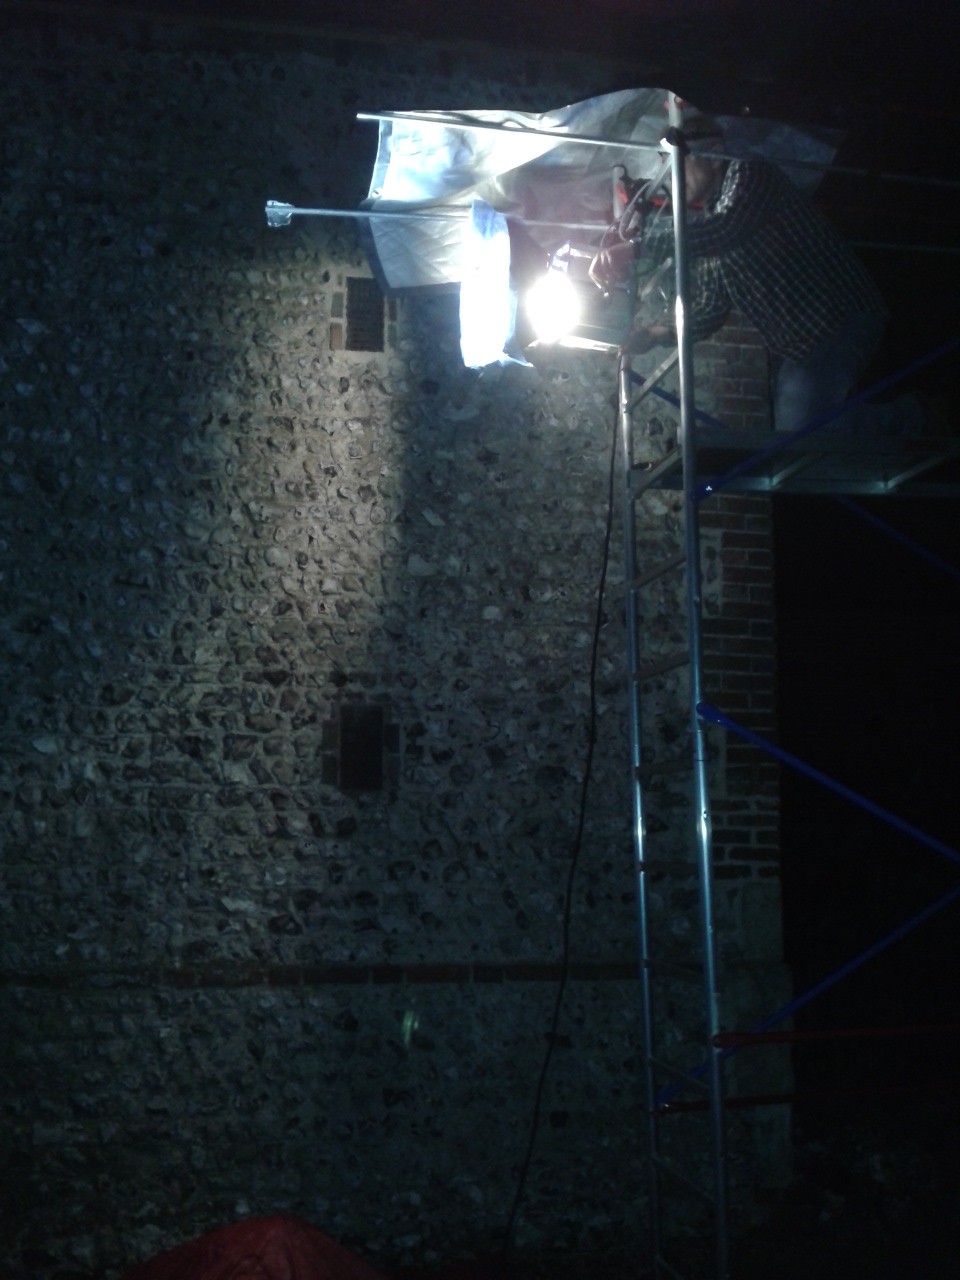
Protecting a 2K arri fresnel from the rain.
There are many uses for a tarpaulin, many of which may appear to have nothing to do with filming, however the long days on location and the unpredictability of the weather (especially in glorious England) mean that a tarpaulin lends itself to being pretty useful in general on set. For DOPs a tarpaulin can provide suitable protection to lights (and camera) from the rain and from dusty or wet terrain. More importantly, they can also be setup and rigged to act as huge flags, with a host of uses. From blocking out large windows in order to control interior lighting to providing a huge source of negative fill on location, tarpaulins are inexpensive, reusable and portable. If you decide to rig one up on location then make sure you remember your spring clamps! (see above)
Flagging the windscreen of a car to eliminate reflections and any changes to ambient light levels.
These are just some of the useful lighting accessories that can be used in low budget film making. However, as you climb the ladder in your film career, you may find yourself using some of these items on the bigger budget productions too!
Remember that there are certain items you’ll need regardless of your budget; lighting gels and cinefoil are the big ones here. Don’t cut corners on your gels, buy the real thing (I recommend Lee filters) so you know you have high quality, accurate colours and so you can avoid setting anything alight. If your budget can stretch a little or if your professional image concerns you then get yourself a few 5 in 1 reflectors; you won’t regret it.
Hopefully you’ve found this helpful and if you have any suggestions of your own for DIY lighting do tell us in the comments!
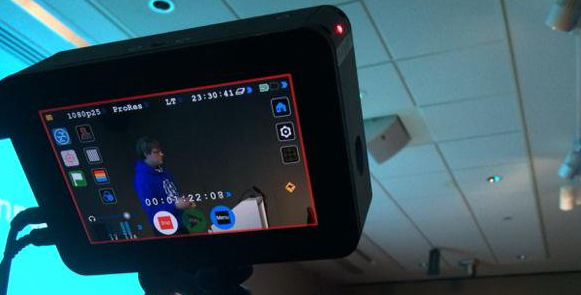
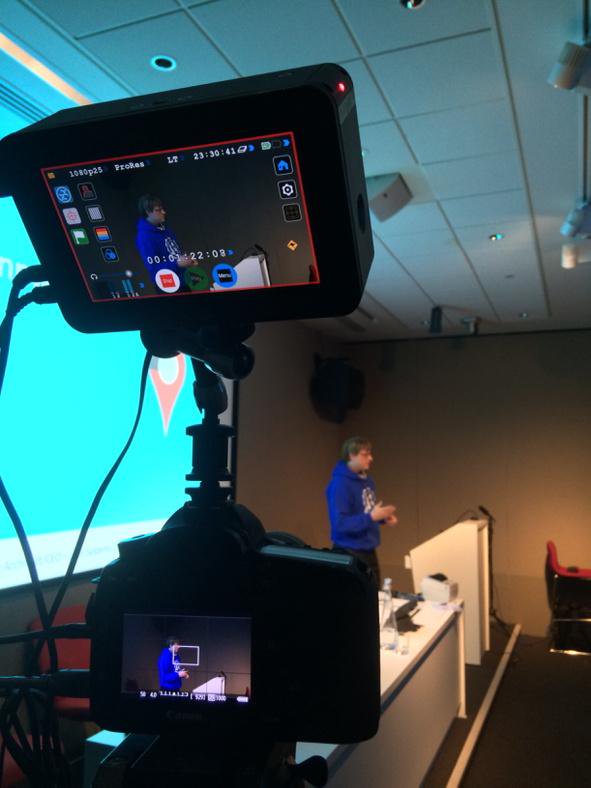
Why we use external recorders to record video
It’s rare to be able to just turn up on set, take a camera out of it’s bag and start shooting straight away. With such a vast range of accessories available to shooters for all manner of shooting situations it’s hard to keep up with, let alone afford all the technology available to us. However, one tool that appears to be cropping up more than most are external recorders. In fact, they’ve been around for a little while now yet they continue to be growing in popularity. For those who may have wondered what the point of these devices is, read on.
What is the point in recording video externally?
1. Edit friendly codecs

Do you know which codec you should be editing in?
This is the primary reason why anyone would record externally. Many consumer and prosumer cameras, notably DSLRs (except for a few exceptions), compress footage using codecs that are good for keeping file sizes down and easy playback but aren’t so good for editing and colour grading.
The Canon 5D mkiii for example records internally with the H.264 codec and it’s files can be opened easily on any computer. However, editing using this codec can prove troublesome, often resulting in glitchy or delayed playback. When colour grading the limitation of this codec results in a relatively small dynamic range, meaning that pushing or pulling the image a great deal will result in substantial noise and lack of ability to recover the highlights and shadows. Even with the likes of non linear editing applications such as Adobe Premiere allowing you to conform almost any type of video file to the editing timeline, the limitations of the original codec do not go away. Edit friendly codecs, most notably Apple Pro res 422 (and the numerous variants of it) are a good solution to improving workflow for those who often find themselves batch converting lots of files, being particularly useful for projects with a tight turnaround. These codecs can be found on all good external recorders.
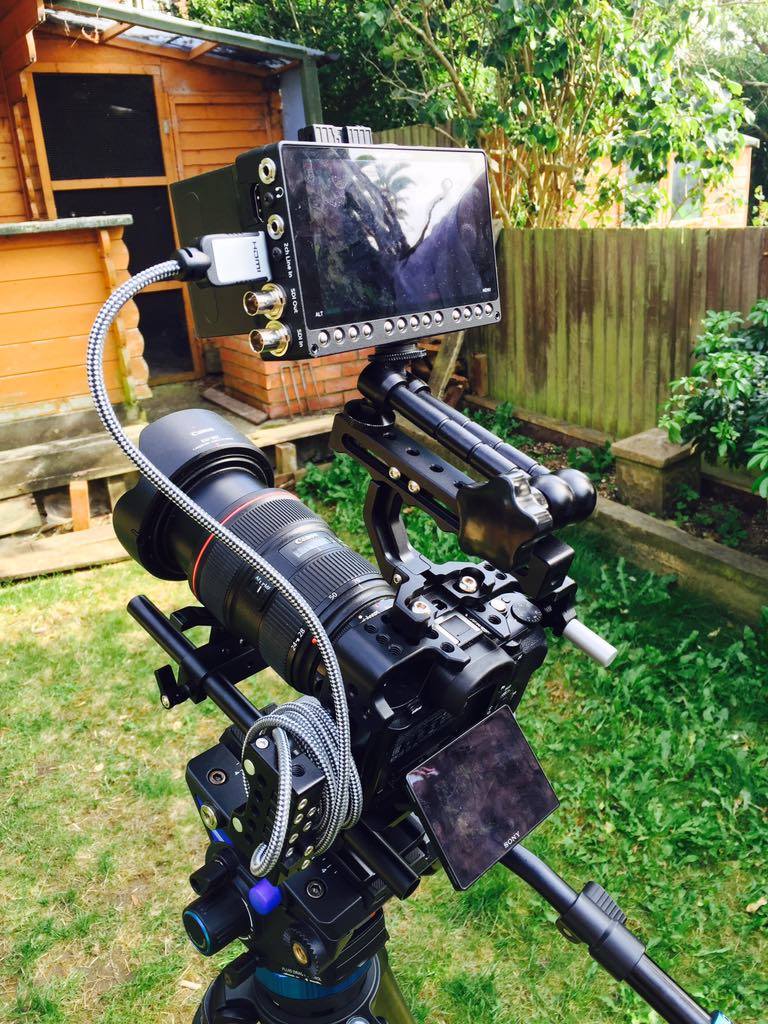
Atomos Ninja blade mounted to Canon 5D mkiii for a conference. Extending the record time to over 30 minutes, using mains power and recording to Pro Res LT made the filming and editing infinitely easier.
2.Higher bit rates
The bit rate required for video footage can vary greatly, depending on what it is that you’re shooting. Live event filming may require lower bit rates for storage whereas commercials would need broadcast quality. Many lower end cameras however are limited in the bit rates that they offer, often not qualifying as ‘broadcast quality’ because their bit rate is too low (by broadcast quality, I’m referring to the minimum bit rate required for HD footage broadcast on the BBC which is 100Mbits/sec). External recorders allow cameras to deliver higher bit rates by using codecs such as pro res 422, as mentioned above. Without compressing and uncompressing footage, digital artifacts that can plague footage for broadcast can be eliminated.
External recorders can also help for those going through an offline and online editing process. Although you’ll need more storage space for footage shot with higher bit rates, shooting directly with them still allows you to use proxies (lower quality versions) so editors who are cutting large projects with substantial amounts of information can edit using lower quality files and then reconnect them with the higher quality files at a later date for colour grading and delivery. This is much more efficient and less processor intensive than editing with colossal amounts of high quality data from the outset. Although you still need to downscale to the proxy, you have one less job to do and the amount of time saved by not having to batch convert masses of data to a high quality codec can be better spent editing.
For more information on the pro res codec and the variants of it, including their effective bit rates, check out this useful article on the matter.
3. Monitoring solutions
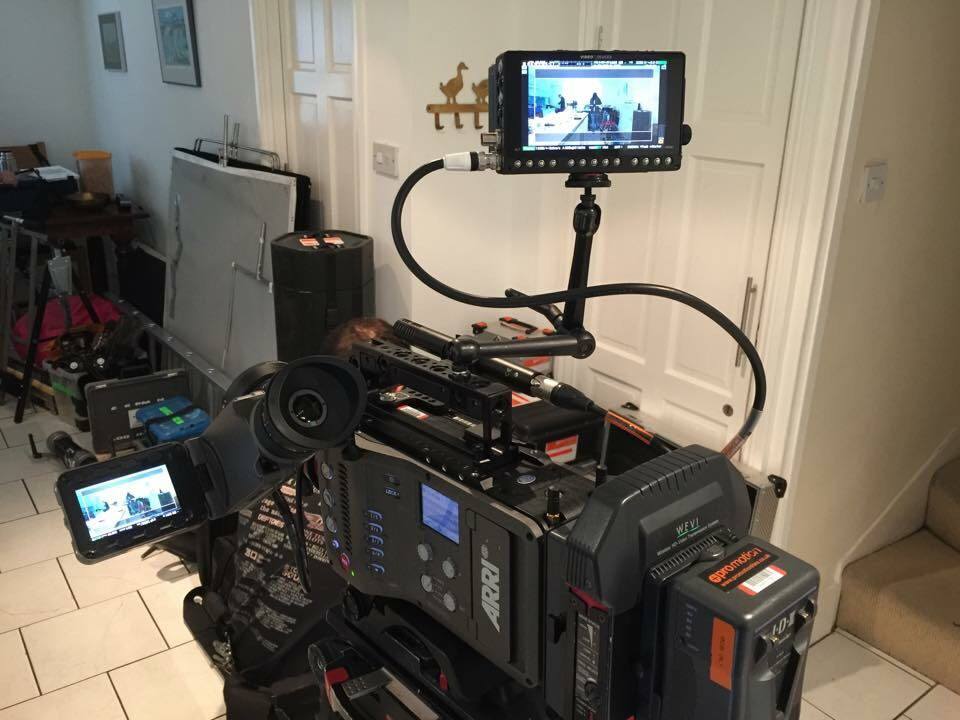
No need to record externally with the Amira which records ProRes internally, however the Sound Devices PIX-E5 made a useful monitor for me. It could have also been used for low res recording for quick assembly edits.
Excluding the Atomos Ninja Star, most external recorders include a screen for monitoring purposes. Most of these are in fact larger than the inbuilt LCD screens on most cameras which make them incredibly useful even if you aren’t recording to them! For those situations when you can’t reach the viewfinder or see the screen, or another person needs to see the screen such as an assistant or client, having an extra screen can speed up the filming process.
Now, whether recorders are a suitable replacement for professional, colour accurate monitors or not is another topic entirely, however for the purposes of most shoots the extra screen is rarely going to be a hindrance. What’s more, inbuilt tools and scopes for exposure (waveforms, false colour and zebras.) and achieving critical focus (peaking and magnification) are usually offered in addition to the screen. Even if some of these features are included on the camera, the chances are there will be more on the recorder (and they will be much easier to use!).
4. Cost efficient & reliable media
Most external recorders store files on readily available HDDs and SSDs*. The former is more cost effective per gigabyte whereas the latter is often faster and more reliable with no moving parts. Either way, both these methods of storage are easy to find, purchase and change, unlike some storage media that can be extremely expensive (e.g. red mag SSDs and SxS cards). If you’re going to be recording hours of footage at high bit rates, affordable and reliable storage should be at the top of your list of priorities.
*The Atomos Ninja star is an exception, using ultra fast and reliable C Fast cards. This ultimately comes at a premium.
5. Compatible powering solutions

Dual batteries can be a godsend
Not a primary reason for using but models offered by Atomos and Video Devices in particular are well noted for their compatibility when it comes to power and in some instances can out last the camera (5D shooters, take note!). The Atomos Ninja Blade for example can be powered by Sony NPF, Canon and Nikon batteries, as well as with an AC unit. Adding to this, dual battery slots are a common feature in most recorders and allow for continuous use on location.
Do we need external recorders for every shoot?
A quality recorder can be a useful asset as well as a costly, glamorous add on. The question is, do you need one or want one?
The answer to this, as I would say about any other bit of equipment is no; there is always a time and a place. Sometimes it is simply easier to turn up with your camera and shoot. News gathering, weddings and sports are just some examples where it might just be easier to shoot in camera, especially if it means the difference between getting the shot or not. However, this is all relative to the camera you’re using in the first place (if you need some help choosing a camera it may be worth checking out an earlier article on how to choose the right camera for the job).
External recorders have been designed to get an extra lease of life out of cameras old and new and to make content producers’ lives that little bit easier. However despite this, we shouldn’t forget that every extra gadget needed to get our desired results is another item that needs to be powered, mounted, connected, protected in transit and supported with compatible media; all of which usually come at extra cost. Ultimately it’s down to you and what you shoot to determine whether a recorder is a suitable investment for you or something to hire on occasion.
In the case of the Sony A7S mark i, an external recorder was a solution to a camera that could record 4K video but not internally
Prices for external recorders can range from a few hundred to several thousand pounds, depending on the features, connections, maximum resolution and frame rates offered. Below are some of the popular manufacturers: